Friday, March 30, 2012

OMG Smoothie


My pretty pretty food journal....

I know, I know, we’re supposed to have a large breakfast, a medium lunch and a small dinner.  But sometimes my day turns out like a rushed breakfast, I forgot about lunch and what the heck will I make for dinner.  This smoothie is my favorite fast breakfast.  I only have one cup of coffee a day and this is how I like it.  I’ve stopped going to Starbucks but I miss their wonderful fantastical concoctions of coffee.  So now I can have my concoction and drink it too.  And it’s much cheaper!

I just throw this together so it’s really flexible if you’d rather have more or less of something.  If you don’t want to use coffee then just use almond milk. 


The famous food journal entry....


I like my smoothies nice and cold, so I pour them over ice or use frozen banana.  The trick is to take the bananas that are getting brown, peel them, put on a paper plate, cut them in half and chop each half into small dice-sized pieces, and put the plate in the freezer.  Then I just reach in and grab my handy dandy frozen half a nanner all ready to go.

I named it OMG Smoothie because the first time I made it I wrote in my food journal “OMG Shake!” and a legend was born.


OMG Smoothie
makes one large smoothie

6-8 oz coffee
2-4 tablespoons half n half or cream or almond milk, whatever you got
1 tablespoon almond butter
1/2 banana, cut into small pieces
1 scoop protein powder (I like Bob’s Red Mill Whey Protein Powder)
1 1/2 tbsp cocoa powder
2 tsp agave
fiber powder (optional, I like Metamucil Clear and Natural) 

Put all the liquid in the bottom of the blender first, then add the rest of the ingredients.  Blend at high speed until smooth or everyone in the house comes to the kitchen to ask why you’re making so much noise this dang early in the morning.

1 smoothie = 1 protein serving, 1 fruit serving, 1 fat serving

PS:  do we really need a picture?  If it has tentacles sticking out the top you did it wrong, otherwise, if it looks chocolaty smooth and delicious then you’re okay.

Thursday, March 29, 2012

Cauliflower 'Rice'

This recipe was easy and fast.  It was also delicious.  I had been hemming and hawing over making it but I had promised the ladies on the Facebook page that I would and it was a winner.

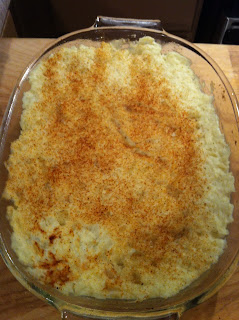
The Kid thought it was rice, but Bubba knows better by now and he still liked it.  I got a picture of it still in the pan but we ate it before I remembered to get a beauty shot on the plate.

This dish is very versatile and you can change it up however you’d like.  You could do Asian, Mexican or Italian versions just by changing the seasonings.


Cauliflower Rice
makes 4-6 servings

1 small head of cauliflower, chopped into chunks
1 small onion or large shallot, finely chopped
2 tablespoons of butter
2 tablespoons of coconut oil
Seasoned salt
Freshly ground pepper


You will need a food processor to make this dish unless you have knife skills like the artificial person Bishop in Aliens 2.  Use the food processor to chop the cauliflower until it resembles rice or couscous.  If you have a smaller food processor, you may have to do this in two batches.

Melt the butter and coconut oil over medium heat and add the onions, cook until they are soft and translucent. 

Stir in the cauliflower and mix evenly to distribute the oil and onion.  Season with salt and pepper.  Cover the skillet, turn the heat down a notch and cook for 10 minutes until cauliflower is softened.  Taste and add more seasoning if desired.

1/2 cup of this dish = 1 serving of veggie

Print this recipe - Cauliflower Rice

Wednesday, March 28, 2012

Single Gluten Free Burger Bun


The top half is the bottom bun and the
lower half is the top bun
 Let me tell you about my new favorite website with great recipes:  Free Coconut Recipes.  I found a lot of things on there that I can't wait to try, like breakfast muffins, desserts and smoothies.

When I saw this recipe I was head over heels, instantly.  It seemed to good to be true.  But it was even better than that.  And it was heavenly to have a sandwich again! 

This recipe makes 2 pieces, a top and a bottom bun.  I doubled this batch and made two sets so Bubba could have a turkey burger in his lunch and I used mine as sandwich bread and we both thought this was just great!  And it was very easy to make.

I only had coarse ground almond flour so mine looks a little coarser than yours might.


Single Gluten Free Burger Bun

Servings: 1
Preparation Time: 10 minutes

Ingredients for one single bun:
1 egg 

1 tablespoon coconut flour 
1 tablespoon blanched almond flour 
1 tablespoon coconut oil (olive oil or melted butter) 
Pinch salt 
1/4 teaspoon baking powder

Optional:
1 teaspoon nutritional yeast 

1/4 teaspoon poppy seeds, chia seeds, sesame seeds


Preheat oven to 350 degrees F.

Add all ingredients and blend together using a hand blender or small food processor. Let the batter settle for a few minutes to thicken (important!).

Split the mixture into two and spoon onto oiled parchment paper to make two 3-inch diameter pools of batter. Top with additional seeds if desired.

Bake for 10 minutes.

Use each piece as top and bottom of a burger bun.

Tuesday, March 27, 2012

Wheat Belly Wheat Free Pizza


I cut this into 15 slices

This absolutely terrific dish is courtesy of Dr. William Davis, author of “Wheat Belly”.  This recipe is located in Appendix B, page 248 of the hardback and reprinted with his gracious permission.

Folks, if you haven’t heard of or read this book, I highly suggest you do so.  The Wheat Belly philosophy is basically Stage 1 of The Perfect 10 diet.  And I don’t know about y’all, but once I went to Stage 2 and added grains back in, I went *pllllgbbbbltth* and kept struggling and wondering what I was doing wrong.  The information I read in this book really opened my eyes and helped me to make better choices with regard to grains and wheat.   Also, their Facebook page is really helpful and fun; Dr. Davis actually shows up several times a day to answer questions!  (must be nice huh?  I heard Dr. Aziz used to do that a few years back but no more….)  And they have a recipe guru over there too, he’s figured out some wheat-free bread recipes and has them available to share.

But don’t worry – I’m not gonna jump P10 ship and head over to the Wheat Belly bash.  I think that both of them are a great help to me right now and I am learning so much from each.  I think you will too. 

This pizza was so good!  You could fill up on just two slices of it.  The crust is great BUT it’s delicate so this is a fork and plate kind of pizza.  I had some Boboli pizza sauce in the freezer so I used that and I think that it was just right – it kind of distracted them from all the veggie and turkey toppings and once again, they had no idea it wasn’t ‘real pizza.’  And believe me, the Kid looks for stuff like that so she can accuse me of trying to feed her healthy food…

Wheat-Free Pizza (Cauliflower Crust)
Makes about 15 square slices

Crust:
1 head of cauliflower, chopped
1/4 cup extra-virgin olive oil
2 large eggs
1 cup shredded mozzarella cheese (4 oz)

Pizza:
2 cups shredded mozzarella cheese (8 oz)
12 oz pizza sauce or 12 oz tomato paste
Choice of veggie toppings: bell peppers, onions, garlic, spinach, olives, mushrooms, zucchini, etc.
Choice of meat toppings:  ground turkey, diced chicken, diced nitrate free sausage
Fresh or dried basil
Fresh or dried oregano
1/4 cup grated Parmesan cheese


The crust as it came out of the oven....

Boil the cauliflower until soft, about 20 minutes.  Drain and mash.  Add 1/4 cup EVOO, eggs and 1 cup of mozzarella cheese and mix well.

Preheat oven to 350F.  Lightly coat a pizza pan or large rimmed baking sheet with about 1 tablespoon of olive oil.

Pour the cauliflower mixture into the pan and press/spread the ‘dough’ into a flat pizza-type shape no more than 1/2 inch thick, mounding it up higher at the edges.  Bake for 20 minutes.


Now is the time to prep your toppings.  I like all my toppings cooked, so I threw some onions, zucchini, mushrooms and cut up chicken sun-dried tomato sausage in a skillet with EVOO and the seasonings.  I also crumbled up a homemade turkey burger patty in there.

Remove the pizza ‘crust’ from the oven (leave the oven on) and spread it with pizza sauce or tomato paste, top with mozzarella, then add the toppings and drizzle with 1/2 cup EVOO.  (IF you cooked your toppings in EVOO, don’t add the extra).  Sprinkle with Parmesan and return to the oven for 10-15 minutes.

Cut the pizza into slices and use a spatula to transfer pieces to the plates.


This is a small paper plate...yes, from Costco.


So, depending on how much pizza you ate, you'll have to guesstimate your servings of veggie, protein and fat.  I would say 1-1/2 veggie and 1/2 fat and 1/2 protein on a normal slice like I had. 


Print this recipe:  Wheat Free Pizza


Monday, March 26, 2012

Shepherd's Pie (aka Superman Pie)

This dish brings back so many memories of childhood.  My mom made a very simple version and it was always good to feed our large family.  She’d layer cooked ground beef and a can of creamed corn and top it with mashed potatoes and some cheese and then heat it up.  Of course, once we got tired of having it too often, my mom came up with a clever idea (which you may borrow).  She told us we were having Superman Pie for dinner –we were so excited that we didn’t mind it was shepherd’s pie.  The next time, it was Wonder Woman Pie…and so on.  Or, she’d let us do the honors and we’d all be so excited to eat the dinner that we got to name!

This is a recipe that Jenn H. pointed out to me on the Food Network website.  Well, it didn’t start out this way – she substituted cauliflower for potatoes and turkey for the beef and when she told me about it I went crazy for the idea and had to make it for myself and then share it all with you.   The great thing about this was that I could sub whatever I had one hand - no carrots, so I used celery, no peas, so I used some chopped green beans and I added a small can of drained mushrooms.

Oh, and if I may take a moment - both Bubba and Kid thought this was the very best Shepherd's Pie I'd ever made!  Neither of them had any clue it was turkey and cauliflower.  And it made wonderful leftovers the next day for lunch as we listened to the cold rain pouring down...

Shepherd's Pie
6-8 servings

1 head of cauliflower, chopped
2 tablespoons sour cream or softened cream cheese
1/2 cup cream or milk
2 tablespoons butter
garlic salt and pepper

1 tablespoon extra-virgin olive oil
1 1/4 pounds ground turkey
Salt and freshly ground black pepper (I used seasoned salt)
1 carrot, peeled and chopped
1 onion, chopped
2 tablespoons cornstarch mixed with 1 tablespoon water
1 cup beef stock or broth
2 teaspoons Worcestershire
1/2 cup frozen peas
1 teaspoon sweet paprika
2 tablespoons chopped fresh parsley leaves (or sub 2 teaspoons dried)


Boil cauliflower until tender, about 15 minutes. Drain, return to pan and add sour cream, milk and butter and mash until potatoes are almost smooth.  Season to taste.

While the cauliflower boils, preheat a large skillet over medium high heat. Add oil to hot pan with turkey.  Season meat with salt and pepper. Brown and crumble meat for 3 or 4 minutes.  Add chopped carrot and onion to the meat. Cook veggies with meat 5 minutes, stirring frequently. In a second small pan or measuring cup warm up the broth and Worcestershire sauce.  Pour into the meat mixture, then drizzle in the cornstarch/water mixture and stir about 1 minute.  Stir in peas.

Preheat broiler to high. Grease a small rectangular casserole and add meat and vegetable mixture. Spoon cauliflower over meat evenly (you may not use it all). Top cauliflower with paprika and broil 6 to 8 inches from the heat until potatoes are evenly browned. Top casserole dish with chopped parsley and serve.

1 cup serving = 1 protein, 2 veggie and 1/2 fat serving

Print the recipe here:  Shepherd's Pie

Friday, March 23, 2012

Cream of Broccoli Soup

Every single time I make Cream of Broccoli soup I look at it and say ‘I’m not gonna like this’ – but I always do!  I guess it’s not so purty as you’re making it but it turns out great.

So yes, you suppose correctly.  Pretty much any kind of vegetable can be made into soup, there is more or less a basic pattern to it but they all taste great.  And to make really great soup you do need some way to puree it; either with an immersion blender (also called a stick blender) or a regular blender, but the regular blender is more of a hassle.

For those of you who are a certain age group, you will be required to sing along with Dana Carvey - …choppin’ broccoleeeeeee…choppin’ broccoliiiiiii, -  during the cutting of the vegetables.

I also secretly chopped up some zucchini and threw it in with the onions because I needed to cook it soon and because the Kid doesn’t like it – what she doesn’t know won’t hurt her.  Since you’re going to puree it, you could sneak all kinds of stuff in there.

Cream of Broccoli Soup
serves 4-6

1 tbsp butter and 1 tbsp olive oil

1 onion, chopped

1 clove of garlic, chopped

16 oz broccoli florets, fresh (or frozen and thawed)

1/2 cup sharp cheddar cheese

4 cups chicken or veggie broth

1/2 cup milk or cream or half & half

2 tbsp sour cream

salt and pepper


In a large soup pot, melt butter and olive oil over medium-high heat.  Add onion and cook three minutes until soft, add the garlic.

While onions are cooking, roughly chop up the broccoli and throw into the pot, and sauté in the onions and butter for a few minutes.

Add the broth, cover and simmer.  For fresh broccoli, cook about 10-15 minutes and for thawed broccoli, cook about 3-5 minutes.

Stir in the milk, cheese and sour cream into the pot and puree until smooth.  If you like your soup a bit thicker, combine 2 tablespoons of water and 1 tablespoon of cornstarch in a separate dish and mix into the soup until thickened.

Season to taste with salt and pepper.  Serve with a little dollop of sour cream and a sprinkling of cheddar cheese if you’d like to appear all fancy and gourmet.

1/2 cup of soup = 1 vegetable serving and 1/4 fat serving, don't you think?

Print the recipe:  Cream of Broccoli Soup

Thursday, March 22, 2012

Sesame Crusted Salmon


I like to make a special-stick-to-your-ribs-looks-like-I-went-all-out Sunday dinner, I think it’s a Midwestern thing.  However, while this was quite special, it took almost no time at all and it was good.  I paired it (oh listen to me sounding all Top-Cheftastic!) with Easy Creamed Spinach, which I will post separately.

At first the family poked at it, rolled their eyes at it…and then ate it all.  They added a little soy sauce to it for an extra kick.  I’m going to use my leftovers in a salad tomorrow.

This is another great recipe borrowed from my new favorite website, Deliciously Organic called Sesame Crusted Salmon.


Sesame Crusted Salmon
Serves 4

1/3 cup sesame seeds

1 tablespoon plus 2 teaspoons coconut oil, divided

Sea salt and freshly ground pepper

4 salmon filets, skin-on, about 1-inch thick


Spread sesame seeds on a pie plate. Brush salmon with 2 teaspoons coconut oil.

Season flesh side with salt and pepper, then press flesh side in sesame seeds, turn and press skin side in sesame seeds to coat.

Heat a large skillet over medium heat until very hot, about 2-3 minutes. Add remaining 1 tablespoon coconut oil and swirl to coat.


This piece would be considered two P10 servings.

Add fillets flesh side down and cook without moving until flesh side is golden brown, about 3-4 minutes. Turn fillets and cook, without moving, about 3 more minutes until skin side is golden brown.

Remove from pan. Serve immediately.

One 3 ounce piece of salmon is 1 protein serving and 1/2 fat serving.

A 3 ounce piece of meat is the size of an iPod or the palm of your hand (without fingers).

Print the recipe here:  Sesame Crusted Salmon

Wednesday, March 21, 2012

Easy Garlic Creamed Spinach

Creamed spinach is one of my favorite dishes.  I found this really easy recipe and knew I needed to try it soon.  I served it with Sesame Crusted Salmon, which will be posted separately.

As we ate it, we felt it was missing a little something, and Bubba decided it needed some nutmeg, so I added that.  I also think you should use as much cheese as you would like until it's as creamy as you want.  I made half of this recipe and as you can see, it doesn't look too creamy but it tasted good.


Easy Garlic Creamed Spinach
serves 6

Two 10-oz boxes frozen chopped spinach, thawed and drained*
   or two 10-oz bags tripled washed fresh spinach, coarsely chopped

1 tablespoon butter

5.2 oz package of creamy garlic herb cheese, like Boursin or Alouette


1/2 teaspoon nutmeg - less or more to your taste


Melt the butter in a large heavy skillet and add the spinach.  Cook, stirring, for 3 to 4 minutes – just enough time to barely wilt the fresh spinach or heat through the thawed spinach.

Spoon the cheese into the skillet and stir until completely melted, stir in the nutmeg and serve.

1/2 cup = 1 veggie serving and 1/2 fat serving
*to really truly honestly and absolutely drain the thawed spinach, the best way I've found is to put it in a dishtowel (preferably a green one) and wring it out as hard as I can.

Print the recipe here: Easy Garlic Creamed Spinach

Tuesday, March 20, 2012

Grain-Free Pancake or Waffle Recipe


The other day I was blessed to run across this website, Deliciously Organic
Carrie Vitt is dedicated to providing recipes that use unprocessed, organic ingredients. 
This is a great site for us to check out and see some awesome recipes that can be altered to follow the P10 diet.


This amount of batter will make
4 medium sized pancakes

I tried Carrie's recipe for Grain Free Pancakes/Waffles, swapped out the peanut butter and honey, and was surprised at how much I liked them.  Bubba thought they should be a little sweeter but I topped mine with bananas and that was lovely!
What other nut butters would you use in this?


Grain-Free Pancake or Waffle Recipe
This is a great recipe to play with. The batter isn’t too sweet, so if you want a sweeter batter add a bit more agave. You can also add different spices, chopped nuts, or extracts. Serves 2
1/2 cup almond butter
2 large eggs, gently beaten
1 teaspoon vanilla extract
2 tbsp plain whole yogurt
1 tablespoon agave
Butter for cooking

Whisk all ingredients together and either:
- cook in a waffle maker; or,
- heat a large skillet to medium. Add 1 1/2 teaspoons butter and melt, swirling pan to coat. Using a ladle, spoon batter into skillet and fry until both sides are golden brown. Repeat with remaining batter.
Top with additional agave, butter or bananas.
Print the recipe for Almond Butter Pancakes

Monday, March 19, 2012

Crispy Eggs

This is a quick and easy Sunday morning breakfast that I simplified from a Nigella Lawson recipe.  The neat thing is, you can fire it up or down according to your tastes.  At my house we think Taco Bell is spicy so if you like it mo’ hotter, mo’ better, help yourself.  Just pay attention to the label on your hot sauce or salsa, or simply add fresh chopped whatever burns your face off peppers.

This is a Stage 2/3 recipe but I’ll tag it for Stage 1 because you can just leave out the tortilla and it’s still a good breakfast.

Crispy Eggs

Ingredients per person:

2 eggs
1 tbsp chunky salsa  (I used Trader Jose’s salsa from Trader Joe’s)
1 medium whole wheat tortilla
cheddar cheese, shredded
1 tbsp olive oil or butter for cooking

Heat oil in the pan.  While it is heating, roll the tortilla(s) up into a tight cylinder, then use a knife or scissors to cut the cylinder into small pieces, starting at one end, letting the tortilla strips fall into the hot oil.  Stir tortilla and cook until crisp, a few minutes.  Remove from pan.

Scramble the eggs in a bowl and add to the pan (the eggs, not the bowl), cook until about halfway done and add the salsa, mix it all up.  When the eggs are almost done but still a little wet, add the crispy tortilla and mix it all together and cook until eggs are done.

Serve with cheddar cheese on top.  I also like to add avocado or sour cream to mine (if I make it too spicy) and serve with a side of refried beans. 

1 serving = 1 protein serving and 1/2 fat serving and 1 whole grain serving

Click here to print the Crispy Eggs recipe

Friday, March 16, 2012

All in the Family


Jenn writes - I also have two little ones (6 and almost 4) and they are big on their sweets and bread... which I want to reverse but their Grandma makes it difficult... she's a true Grandma in that she spoils them with all kinds of treats every time we go! I love her but I wish I could get her on the bandwagon and have her serve “veggie treats” instead :) Any tips on how to start again and stay with it this time?? And how to get the hubs & kids on board or at least start making steps to get them on board?
Ah yes…assimilation.  How do you tell your lovely cooperative eager to do whatever you say children and husband ‘we are eating healthy from now on and you have to like it or else?’ – well, you don’t.  You can't really change others, you can only change yourself.


We eat meatloaf in this house - you Meathead!

I have a husband and an 18 year old daughter and we are were a meat and potatoes family.  Casseroles, roasts, stews, corned beef and cabbage, oh yes ma’am.  Maybe a salad or roasted veggies once in a while but none of that diet stuff! 


So, I started The Perfect 10 Diet on my own.  I made them the usual stuff, and then went a little lighter with the cooking as time went on.  I’d cook chicken and vegetables and I’d put mine on greens and they got some white rice with it.  Then, I slowly started making changes, a little at a time.  I’d change the rice for quinoa or substitute mashed cauliflower for potatoes.  I roasted a lot of veggies the first few weeks, trying many different ones and seeing what was a hit.  Believe it or not, the Brussels sprouts are the favorite.  Now, they eat what I eat and they don't even know what hit them.

AND FOR PETE’S SAKE – don’t tell them what’s in it!  We moms know that’s an automatic EEEEUUUUWWWW!  Mashed cauliflower is ‘mashies’, turkey burgers are ‘burgers’, etc. 

Most likely, your young children are not overweight so don’t put them on Stage 1 – have them start at Stage 3.  They are growing and need the nourishment.  Have them help you make good stuff – talk about how good it is and how it helps you feel good too.  (If they’ll fall for that).  And remember – they have Human Growth Hormone and other factors in their favor because of their youth so they don’t need to have super strict compliance to Perfect 10.  Heck, just cutting back on the sugar and bread they eat will do them a lot of good.  Every little bit helps.

Do your best to make sure that most of their meals are healthy.  Yes, they’ll get into stuff with Grandma and at school and such, but if you can control their breakfast, or pack their lunch and get their dinner most of the time, you’re still ahead of the game.  If you know you’re going someplace with a lot of treats, fill them up with good stuff first to head some of it off at the pass.  Besides, if you restrict them totally from their ‘treats’ then you might end up with a kid who won’t learn how to control themselves when confronted with that sort of thing.

Well, that’s my two cents.  My family is different from yours, so this might work and it might not.  But most of all DO THIS FOR YOURSELF - and maybe they’ll follow – and maybe they won’t.  But hopefully as time goes on they’ll see how well it works and want to be a part of it.