Friday, October 26, 2012

Just a short break....

Just a quick note to everyone to say THANKS for continuing to hang out with me!  I am so blessed to be able to help people with this blog.

I'm going to not be posting for about a week or so.  My dad died this week and I am having trouble getting through regular every day stuff and need to let the blog slide for a just a short while.

Plus, family is coming to town and I'll be cooking old school favorites for them and not have anything new to post!

Take care - I WILL be back!   If you haven't had time to read the entire blog, go click on the posts for February and start there.

Joley H.

Wednesday, October 24, 2012

Strawberry Chicken Salad

Can I just tell you that this kind of salad is my mostest favoritest in the entire world?  A few years back when they first started serving this kind of salad in restaurants I ordered them right and left and still can't get enough of it.  It's the perfect grouping of sweet and salty and savory.   And the picture turned out awesome!
The P10 books says not to eat salad with too many items on it or else you'll jack up the calorie count but, but, but, this one's okay to do that with.  Really.  Would I lie?  :D


Well, maybe don't overdo the toppings....


Strawberry Chicken Salad
salad greens
avocado, cubed
cooked chicken breast, cubed
strawberries, cleaned, hulled and sliced
Gorgonzola or blue cheese crumbles
walnuts or pecans
butter and sweetener

Melt a spoonful of butter in a skillet and add nuts, mix around to coat and then sprinkle with sweetener, continue to heat for a few minutes and then remove from heat and let cool.

Build yourself a salad - don't be shy - go ahead and put it all together.

For dressing, I made a vinaigrette out of apple cider vinegar and olive oil.  But that's a post for another day.

Enjoy!

Monday, October 22, 2012

Italian Stew

The other night I threw this together and didn't even follow a recipe.  It was more like a 'what will I do with all these extra veggies' sort of thing.  And I was kinda craving pasketti too.  So this was a nice amalgamation of flavors and textures and fridge cleaning (?!?)  Now that's something you won't see on Top Chef...  

By the way, is anyone jazzed for the new season?  'Cause I'm not really....and that's sad.  I liked it better when it was young, hungry, trying to get started chefs, rather than established, already have their own restaurants, already a professional kind of chefs.  Season 3 is my most favorite season (luv me some Howie!) and I still have one episode on my DVR that I can't part with.  It's the episode where they cook for the Elks Lodge and make healthier versions of grandma's cooking, like tuna casserole, meatloaf and fried chicken. 

Oh well, back to the show.  Go through your fridge and see what veggies you have hanging out that need a good home and you can throw together this dish.  The hardest part about making this was getting Bubba out of the kitchen so he didn't see me chopping up the eggplant I was sneaking into enhancing the dish with.  And of course, he loved it and thought it was great.

Italian Stew
makes 6-8 servings

olive oil
1 1/4 lb ground turkey
1 onion, diced
1 large zucchini, cubed
1 small eggplant, cubed
1/2 head cauliflower, cubed
32 oz (2 lbs) marinara sauce
Parmesan and mozzarella cheeses

Cook the ground turkey in a little olive oil, drain if needed and set aside.

Chop all the veggies into about the same sized pieces for even cooking.  If you are trying to be sneaky then peel them so people can't tell what they are.

In same pan,  add some more olive oil and all of the veggies.  Saute on medium heat for about 10 minutes, until the veggies are starting to soften.

Add the meat and the sauce into the veggies and mix thoroughly.  Cover and let simmer for another 10 minutes or so.  Season to taste with garlic, salt and pepper as you like.

Scoop into bowls and top with cheeses.  Eat a warm hearty dinner and giggle silently behind your hand as your family eats veggies they don't care for and have no clue.

Friday, October 19, 2012

Stir Fry Chicken and Broccoli

This was a quick throw together dinner based on items I had just sitting in my kitchen.  I ended up sauteing some shredded cabbage in butter and serving it as a side dish.  I think this would also be good with Cauliflower Rice or some quinoa (Stages 2-3 only for quinoa).

Sorry my pictures always look so narsty....I'm using my iPhone and I don't have very steady hands.  Plus, my talents do not lie in the photographing of food, just creating and eating it!


Stir Fry Chicken and Broccoli
makes 4 servings

3 tablespoons of olive oil
1/2 lb cubed chicken breast
1 large clove of garlic, crushed
4 cups (about 12 oz) of broccoli florets
1/2 teaspoon ground ginger
1 tablespoon tamari
salt and pepper

Heat olive oil in a nonstick skillet on medium heat. Cook chicken for about 4 minutes.

Add garlic and broccoli and stir fry for approximately 5 additional minutes until the broccoli is crisp.  Finish by adding the ginger and tamari, and cook a few more minutes.


Wednesday, October 17, 2012

Italian Sausage and Chickpeas

Chickpeas, garbanzo beans, tomato, tomahto, it's all good.  This was very easy to throw together and if you have a smaller crockpot, use that one.  If you have a larger crockpot then only cook for about 4 hours on low and then keep warm for another 4 hours so this doesn't burn to a crisp.

If you don't have a crockpot I bet you could throw this together in a sauce pan, cover and simmer for about 20 minutes or so.

I like the Open Nature sausage that I buy at Safeway/Vons.  I used the spinach and feta version in this dish.  If that's not your thang you can always use chicken instead.


Italian Sausage and Chickpeas
makes 4 servings

14.5 oz can of diced tomatoes (do not drain)
2 tablespoons tomato paste
2 tablespoons minced garlic
1 teaspoon dried rosemary
1 teaspoon black pepper
pinch of kosher salt
1 can chickpeas, drained and rinsed
12 oz Italian type sausage, nitrate free**

Mix the tomatoes and seasonings and add to the crockpot.

Sprinkle the chickpeas over the tomato mixture, top with sausage and cook on low for 8 hours.

**You can sub chicken breasts cut into 2-3 strips each, but mix the chicken into the sauce first, add a little more salt and then put the beans on top of the entire thing.

Monday, October 15, 2012

Milk Braised Pork Chops

I’m still slowly working my way through that huge stack of pork chops and one of the reasons I really wanted to buy them was to try this recipe.  So simple yet so good.

I served this with a side of Mashed Cauliflower but I can also see using quinoa or even Quinoa Cauliflower Mash with this.  This was a hearty Sunday dinner.


Milk Braised Pork Chops
makes 4 servings

1 teaspoon olive oil
1 teaspoon butter
1 teaspoon fresh thyme leaves or 1/2 teaspoon dried
1 teaspoon garlic, minced
salt and pepper
4 boneless pork chops
2 cups whole milk
2 teaspoons cornstarch
1 tablespoon water
1/2 teaspoon Dijon mustard

Season each chop on one side with salt, pepper, garlic and thyme.

Melt the butter and oil in a large skillet over medium high heat then place the chop seasoned side down and brown on both sides, about 3 minutes per side.  Drain excess fat.

Add the milk to the skillet and bring to a boil, then reduce heat to low and cover, braising the pork for about 25 minutes, turn them over about halfway through.

In a small bowl, mix together the water, cornstarch and mustard. 

Remove the chops from the pan – and yes, the milk will look curdled.  Bring the milk mixture back up to a boil and stir in the cornstarch mixture, whisking constantly for 1 minute. 

Using an immersion blender, blend the gravy until smooth.  If you don’t have an immersion blender then carefully pour the mixture into a blender or food processor and pulse until smooth.

Pour the sauce over the pork and serve warm.

Friday, October 12, 2012

Making Mayonnaise

REVISED FEBRUARY 2013 -
DO NOT USE LIGHT OLIVE OIL - it is treated with bleach!

Let’s give a shout out to my old childhood friend Hellman’s Mayonnaise (and its West Coast cousin, Best Foods).  And if you are waving your hand saying ‘what about Miracle Whip?’ then just slowly walk away before I hurt you…

I had actually stopped buying mayo while on P10 because it’s one of those *can’t resist* foods for me.  I’ve always been intimated by the idea of making mayo and I don’t know why.  And now that I have I’ll keep on doing it and enjoying it. 
Making mayo can be a hit or miss situation though.  My first batch set up perfectly but tasted terrible (I used strong olive oil and white wine vinegar-ugh).  The second batch (strong olive oil and not-fresh lemon juice) never did set up so I tossed it.  The third batch was the charm, using light oil and regular vinegar and tasting as I went along I was able to make real live normal mayo.  
I finally have a use for all of the jars I save...


Homemade mayonnaise has a milder, more neutral flavor than the store-bought varieties, and can be customized to meet your tastes.  And once you get the hang of it you could do all sorts of things to it to change the flavor, like adding garlic or herbs. 
To make 1 cup of mayonnaise you will need:

·                  1 cup of light olive oil (less strongly flavored standard olive oil) or other good-quality oil, like walnut or sweet almond oil
·                  1 egg
·                  1-2 tablespoons lemon juice or vinegar
·                  A pinch of salt (and pepper, if desired)
·                  Water to thin the mayonnaise

Separate the egg. Reserve the whites for other recipes.

For each cup of mayonnaise, add between 1 and 2 tablespoons of fresh lemon juice or vinegar, depending upon your tastes - start by adding 1 tablespoon and then work your way up or add more at the end.  Combine the egg yolk and lemon/vinegar in the bowl, whisking to mix.

You can make mayonnaise in a food processor, with an immersion blender or by hand, with a mixing bowl and whisk. The key for either method is to add oil very slowly, in a steady stream, while the processor is running or you're whisking vigorously. (Note: to stabilize a lightweight mixing bowl, set it on a coiled kitchen towel.)

Continue to whisk constantly, adding the oil in a slow, steady stream.

If the mayonnaise starts looking too thick, add enough water to thin it to the consistency you desire. Add about a teaspoon of water at a time.

When the oil is all mixed in, the mayonnaise should be thick and fluffy, with your whisk forming ribbons through the mixture.

If it never thickened and you're stirring a puddle, chances are you will need to start over. (Or, if you're still partway through the process, you can save the emulsion by adding another egg yolk, whisking vigorously. Add in remaining oil, plus extra for a double recipe), and adjust the seasonings.

Store fresh mayonnaise in the refrigerator and use within five days.

Wednesday, October 10, 2012

Almond Flour Biscuits

Boy oh boy are you in for a treat!  These biscuits really hit the spot and they were so good!  And they were easy to make too.  I got this recipe from The Nourishing Home website and adapted it for P10 use. 

Have you missed biscuits?  Breakfast sandwiches, little sammies, etc.?  Well no more!
In the short time they existed at our house, they were covered with egg salad made with homemade mayo, served as a breakfast biscuit and as sandwich buns. 

If you're going to spend some time cooking ahead for the week, put these on your list.  And hide them from The Kid....just sayin'

Just a couple of notes:  This makes EIGHT biscuits.  I made twelve and ended up with some little guys.  Also, these biscuits have a great texture but are on the sweet side.  And they won’t ‘rise’ like normal biscuits, so if you want a high biscuit, shape it that way.

Now, back to our show!


Almond Flour Biscuits
makes 8 biscuits

2 1/2 cups blanched almond flour
1/2 teaspoon baking soda
1/4 teaspoon sea salt
1/8 teaspoon baking powder
3 tablespoons butter, melted (or melted coconut oil)
1 tablespoon agave
3 tablespoons almond milk
2 large eggs


Preheat oven to 350 degrees.

In a medium bowl, combine almond flour, salt, baking soda and baking powder.

In a small bowl, whisk together melted butter and agave, until smooth. Add the milk and eggs, whisking together until well combined. Using a spoon, stir the wet mixture into the dry mixture until thoroughly combined.

For quick and easy drop biscuits: Drop biscuit dough by large spoonfuls onto a parchment-lined baking sheet, placing the biscuits approximately two-inches apart.

For classic-style rolled-looking biscuits: Scoop a large spoonful of batter into your hands and roll into a ball about the size of an apricot. Then place the dough balls on a parchment-lined baking sheet and gently flatten using the palm of your hand.

Bake about 15 minutes, until golden brown on top and a toothpick inserted in middle comes out clean. Serve warm with butter.

Monday, October 8, 2012

Creamy Salsa Pork Chops

Remember Creamy Salsa Skillet Chicken?   Well if you go to Costco and have a huge amount of really thick pork chops on your hands, you could make this instead.

I took each mega-thick chop and sliced it in half vertically to make two thinner chops.  That makes for a more reasonable serving and it stretches your grocery dollar too.

As usual, you can spice it up and down as much as you'd like to please your palates.

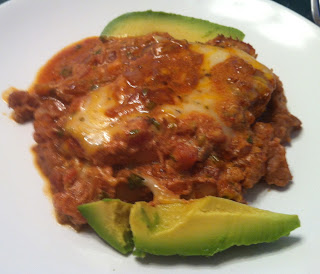
I served this over refried beans and added some avocado to give it color.


Creamy Salsa Pork Chops
makes 4 servings

4 boneless pork chops
2 tablespoons olive oil
1/2 onion, diced
1/2 cup salsa
1/4 cup Greek yogurt (can sub sour cream) 
1/2 cup of shredded cheese, Mexican blend
dried oregano

 
Heat oil in large skillet over medium high heat and saute the pork for about 5 minutes on each side.

Remove the pork from the pan, (add more oil if needed) and saute the onions until soft.  Turn down the heat, then stir in the salsa and the yogurt and warm through, then add the meat back in and make sure the chops get all that nice creamy salsa sauce all over it.

Sprinkle the cheese over the chops and cover until cheese is melted.

Top with a dash of oregano for flavor and a touch of color.

Friday, October 5, 2012

Spinach Casserole

Imagine when to my utter shock The Kid suddenly announces that she "has never really liked spinach."  Well Kid, you are outta luck 'cause Mama is on a spinach kick.  I just can't seem to get enough of it. 

I made mine in the crockpot and it was very well done....I think I either need to oven bake this or get a smaller crockpot.  


Spinach Casserole
makes 4-6 servings

2 boxes of frozen spinach, thawed and drained
2 1/2 cups full fat cottage cheese
1/3 cup butter
3 eggs, beaten
1/4 cup ground flax meal
1/2 teaspoon salt
1/4 teaspoon pepper


Coat the inside (of course) of the crockpot with olive oil.

Mix together all ingredients and spoon into crockpot.

Cover and cook on low for 6 hours.

Alternatively, you could probably bake this at 350 degrees for about 25-30 minutes if you forgot to load up the crockpot before you left in the morning.

Wednesday, October 3, 2012

Chi-Asian Salmon

Normally Bubba doesn't care for salmon so I've been racking my brain to find something so deliciously Asian that he can't help but like it.  I also took the liberty of removing the skin from his piece of salmon and turned out that was most of the problem right there, just couldn't appreciate a nice crispy piece of salmon skin.  So, if someone at your table is complaining, try removing the skin and see if that helps them (it's a texture thing).

This was just a great quick and easy dinner and while the salmon was marinating I roasted some broccoli to go with it.  I almost thought about making Tamari Broccoli but even I managed to realize that was a bit overboard.  Balance, balance, balance people!

Oh, and coconut sugar is my new favorite thing BECAUSE it's pretty much the brown sugar substitute of the P10 party!  So I gotta say you do want to use coconut sugar instead of just any sweetener 'cause you wanna get that awesome brown sugar/tamari thing going on.

Or, you could serve this nummy piece of fish over a bed of cool crisp greens and add a sliced avocado.  Shoot, now I gotta go make this again so I can try that....


Chi-Asian Salmon

4 pieces of salmon, about 6 oz each (or one large fillet if you prefer)
3 tablespoons coconut sugar
2 tablespoons tamari
1 teaspoon rice wine vinegar
1 teaspoon chia seeds

In a small bowl mix the sugar, tamari and rice vinegar.

Pour the mixture into a ziplock bag and place the salmon in the bag. Marinate the salmon for 20 minutes.   (this would be a good time to start some veggies roasting in the oven).

Turn the oven on to the broil setting. Cover a baking sheet with foil and put the salmon skin side down on the foil.

For the smaller pieces, broil for about 8 minutes;
for the large whole filet, broil for about 15 minutes or until the fish is thoroughly cooked and flakes easily on a fork.

Sprinkle the salmon with chia seeds and serve.


Monday, October 1, 2012

Italian Dessert Ricotta

Happy Monday!

Before we get started, I wanted to just give a general announcement that for the time being I’m only going to post on Monday, Wednesday and Fridays so that I have time to devote to the Meal Planning project and also because I can’t cook fast enough to keep up with daily recipes and blogging so I hope you will all be patient.  Remember to come to the P10 Recipes Facebook Page to ask questions or share ideas!  If you have a recipe you'd like to share let me know, I'd be happy to post it.  After all, I'm only one small (getting smaller) person and there's so many of us!

This was a nice light dessert.  If you’re not a fan of espresso (by the way, say eSpresso, not ‘expresso’-pet peeve!), it may not be your cup of tea coffee but you could skip the espresso and top with berries if you prefer.  Ricotta is rich and creamy and isn’t just used for lasagna anymore!

Just a couple of tips – make sure the lemon zest is mixed in well or your husband will take a bite of his dessert and go ‘aggggggghhhhh!’.  Also, you could use actual ground espresso beans instead of instant if you prefer, I found the instant type easier to use.


This was a great dessert after having
Cheesy Crust Pizza

Italian Dessert Ricotta
makes 4 servings

2 cups whole-milk ricotta cheese
2 tablespoons coconut sugar
2 teaspoons grated lemon zest
Instant espresso

Make 1/4 cup espresso and put in the fridge to chill.

Using a blender or food processor, mix the cheese, sugar and zest until smooth, at least 2 minutes or so.  Divide the mixture into 4 small bowls or ramekins.  Chill before serving.

When you are ready to serve, drizzle about 1 tablespoon of the chilled espresso over the top of each serving and then sprinkle with a pinch of the instant (or ground) espresso.