Wednesday, January 30, 2013

Almond Flour Biscuits

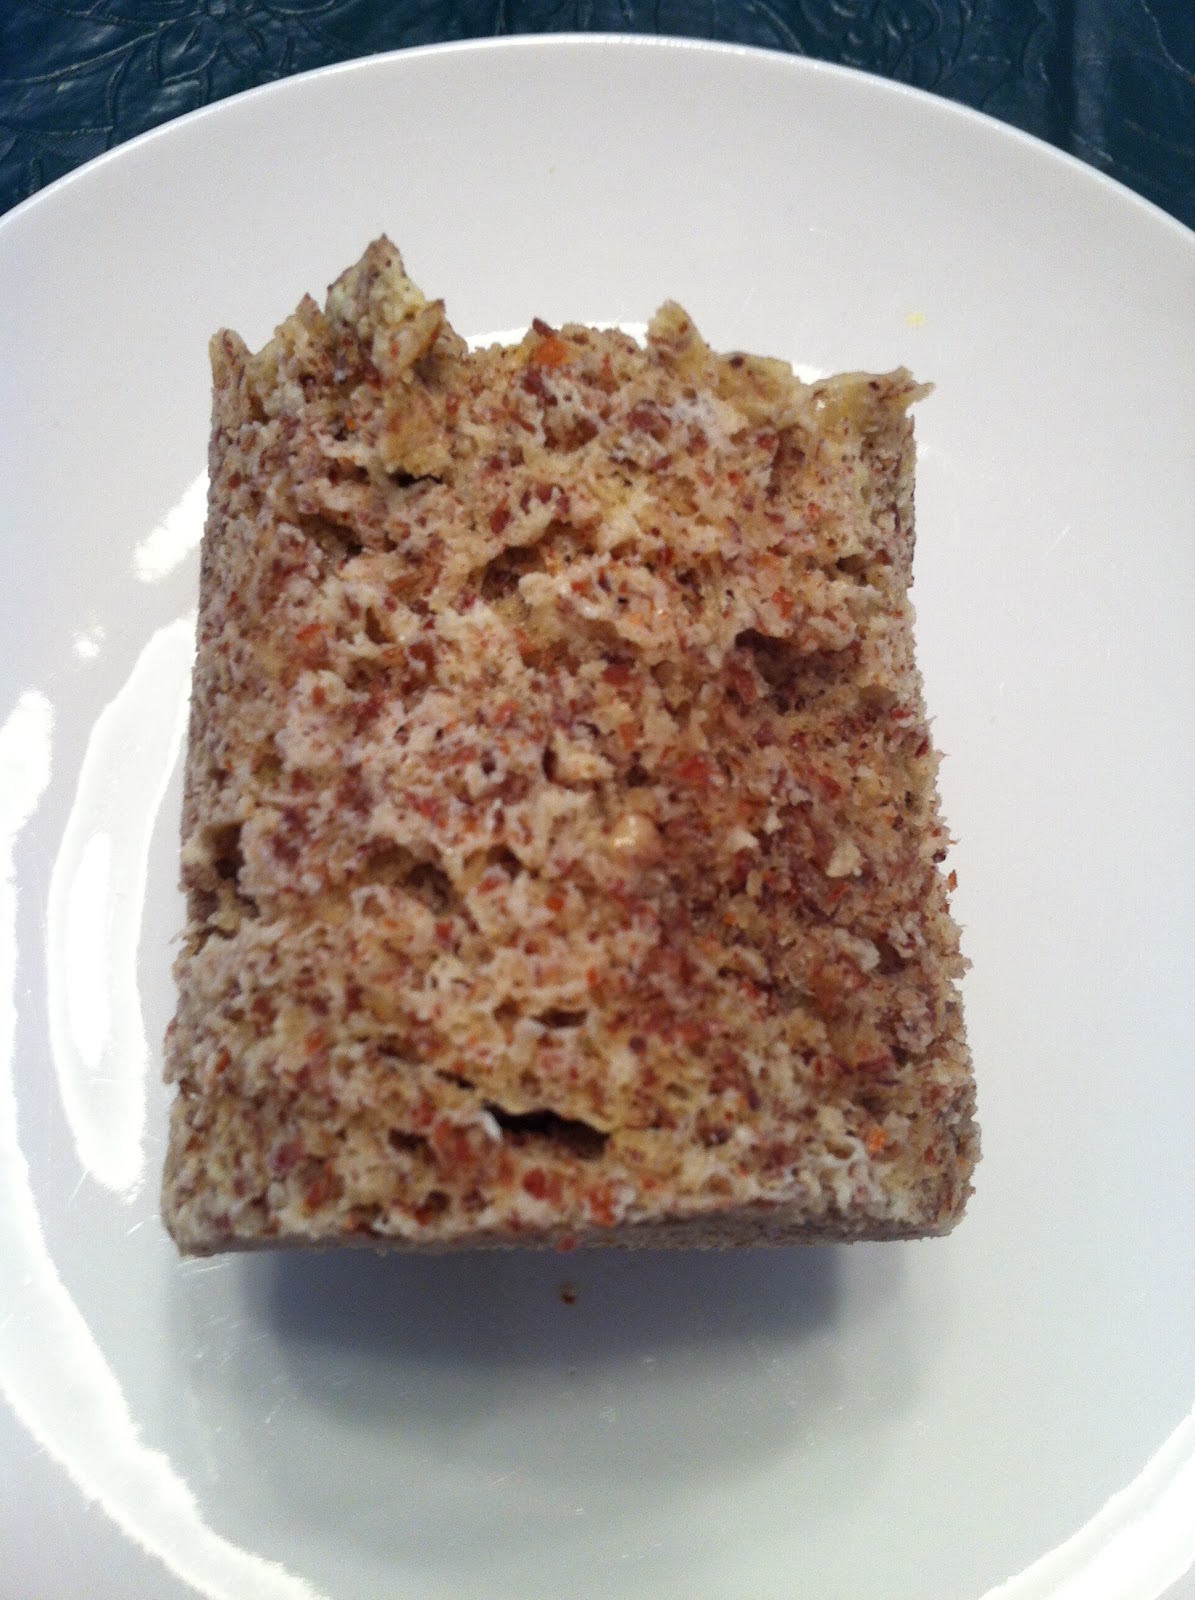
Boy oh boy are you in for a treat!  These biscuits really hit the spot and they were so good!  And they were easy to make too.  I got this recipe from The Nourishing Home website and adapted it for P10 use. 

Have you missed biscuits?  Breakfast sandwiches, little sammies, etc.?  Well no more!
In the short time they existed at our house, they were covered with egg salad made with homemade mayo, served as a breakfast biscuit and as sandwich buns. 

If you're going to spend some time cooking ahead for the week, put these on your list.  And hide them from The Kid....just sayin'

Just a couple of notes:  This makes EIGHT biscuits.  I made twelve and ended up with some little guys.  Also, these biscuits have a great texture but are on the sweet side.  And they won’t ‘rise’ like normal biscuits, so if you want a high biscuit, shape it that way.

Now, back to our show!


Almond Flour Biscuits
makes 8 biscuits

2 1/2 cups blanched almond flour
1/2 teaspoon baking soda
1/4 teaspoon sea salt
1/8 teaspoon baking powder
3 tablespoons butter, melted (or melted coconut oil)
1 tablespoon agave
3 tablespoons almond milk
2 large eggs


Preheat oven to 350 degrees.

In a medium bowl, combine almond flour, salt, baking soda and baking powder.

In a small bowl, whisk together melted butter and agave, until smooth. Add the milk and eggs, whisking together until well combined. Using a spoon, stir the wet mixture into the dry mixture until thoroughly combined.

For quick and easy drop biscuits: Drop biscuit dough by large spoonfuls onto a parchment-lined baking sheet, placing the biscuits approximately two-inches apart.

For classic-style rolled-looking biscuits: Scoop a large spoonful of batter into your hands and roll into a ball about the size of an apricot. Then place the dough balls on a parchment-lined baking sheet and gently flatten using the palm of your hand.

Bake about 15 minutes, until golden brown on top and a toothpick inserted in middle comes out clean. Serve warm with butter.

Monday, January 28, 2013

Muffin in a Minute

You're probably missing bread about now.  Well weep no more, this is easy and really versatile.  There are many different versions you can play with - based upon what you like and what you want to try!  You are limited only by your imagination here.  One of the things I miss MOST is my daily chocolate chip bagel with cream cheese from the deli so I added dark chocolate chips and some truvia and topped it with cream cheese.  Bubba likes the version I make with cinnamon and walnuts.  I made a savory version with butter and parmesan and used it as a dinner roll.

Lots of people put fruit or various seasonings in them to get either a sweet version or a savory version.  Since it's a quick and easy 'muffin in a mug' you can make a different one for each person at the table.  It's wonderful for those on Stage 1 who are missing the grains because the almond flour and flaxseed meal are nuts and seeds and not grains, so enjoy!

QUICK TIP - measure/mix up the dry ingredients ahead of time and then whip it all together in the morning.

Other ideas for this recipe include slicing it up and using it for french toast or cutting it up to make a bun for a sandwich.  I cut it up and put my runny eggs on it.

This may not seem like a lot but it's very filling! 
PS:  don't sub coconut flour, when I tried that it was a flop.  :(


Muffin in a Minute

1 egg

1/4 cup almond flour

2 tbsp flaxseed meal or ground flaxseed

1 tbsp. coconut oil or butter melted

1/2 tsp baking powder

*SWEET version - also add  1 tsp sweetener, 1 tsp cinnamon and 1/2 tsp vanilla,
(may also add chopped pecans, walnuts, strawberries, blueberries, dark choc. chips.)

*SAVORY version:  also add garlic or onion powder, parmesan cheese or rosemary


Put the oil or butter at the bottom of a coffee mug and zap it to melt it (this also coats the mug so the muffin doesn't stick)

Stir the rest of the ingredients into the mug until smooth and microwave 1.5 to 2 minutes, until the top is no longer wet. 

I like to run a knife around the edges to free it up and it just pops out onto the plate.

Spread with butter or cream cheese or nut butter.

Print the recipe along with a picture of my favorite Wonder Woman mug:  Muffin in a Minute 


Please comment below and share your ideas on what YOU'D put in your muffin - thanks!


Friday, January 25, 2013

Overnight Oatmeal

Just a heads up - this recipe is for STAGES 2 and 3 ONLY - sorry Stage 1 peeps...but, if this is something that would work well for your family feel free to go ahead and run with it.

I’m testing ‘grab and go’ or make-ahead items for those who want a good breakfast but don’t always have time to make them.   This recipe is a simple 'stop, drop and scoop' and then out the door. 

This was pretty good but Bubba (my hubby) and I thought the lemon zest was a little heavy, so I’ve scaled that back for you.  And feel free to use whatever fruit you would like, peaches, apples, bananas, berries, etc.  The original recipe says ‘serves 4’ – which in real life terms is 6 normal people or 2 teenage boys.  This fills you up fast!

I didn’t have rolled oats; I used steel cut oats and it was a little chewy and nutty tasting but we liked that better than soft mushy oatmeal.  I think you would too.

Overnight Oatmeal
serves 6

This affordable, healthy breakfast provides protein, whole grains and fruit to help you start your morning right.  The twist is that it virtually prepares itself while you’re sleeping — simply serve in the morning, straight from the fridge or warmed if you prefer.

2 cups uncooked rolled oats (not instant or quick cooking)

2 cups unsweetened almond milk

1/2 teaspoon grated lemon zest

1/2 teaspoon vanilla extract

Toppings:

chopped pecans, walnuts or almonds

Your choice of fruit, peeled and chopped

agave nectar


Combine oats, milk, vanilla and zest in a bowl, cover and refrigerate overnight.

The next morning, scoop oatmeal into bowls and top with nuts and fruit.  Add butter or a drizzle of agave nectar if you’d like.  You can eat this hot or cold.

1/2 cup of this oatmeal is 1 serving of grains and 1/2 serving of fat.  Remember to count whatever toppings you use as well.


Wednesday, January 23, 2013

Spinach Mushroom and Swiss Crustless Quiche

Well it looks like we're focusing on make ahead breakfast foods this week...and why not?  What's better than a zip-zap breakfast when you're in a hurry?   I also made this for the gang at work one morning and they went crazy for it!


Here is another revamped Whole Foods recipe that also fits the make-ahead, grab and go breakfast for busy people when we don’t have time to sit down to eat in the morning.

I put together this casserole the night before and then baked it while I was walking on my treadmill the next morning.  It was really good and, for the purposes of our most important research, I then refrigerated the leftovers and also froze a piece to test them out the next day.  It reheated nicely and still tasted great.
I thought 16 pieces was plenty in the 9x9 pan. 
My quiche - served with a side of avocado.


Makes 16 servings

extra-virgin olive oil
1  yellow onion, thinly sliced
1 pound button mushrooms, thinly sliced
3/4 teaspoon salt and 1/2 teaspoon freshly ground black pepper, divided
6 eggs
3/4 cup milk
1 teaspoon freshly grated nutmeg
1 1/2 cups shredded Swiss cheese
1 (16-ounce) bag frozen chopped spinach, thawed and squeezed to remove as much liquid as possible (wring it out inside a dish towel)

Preheat oven to 350°F and grease a 9-inch square pan with olive oil; set aside.

Heat 1 tablespoon olive oil in a large skillet over medium-high heat. Add onion and cook until golden brown, 7 to 8 minutes. Add mushrooms, 1/2 teaspoon salt and 1/4 teaspoon pepper and cook until liquid is absorbed, 10 to 12 minutes; set aside to cool.

In a large bowl, whisk together eggs, milk, nutmeg and remaining 1/4 teaspoon salt and 1/4 teaspoon pepper. Add cheese, onion, mushrooms and spinach and mix well.

Transfer to prepared pan, spread out evenly and bake until set in the middle and golden brown, about 45 minutes. Let cool 10 or 15 minutes; cut into squares and serve.


Print this recipe:  Spinach Mushroom and Swiss Crustless Quiche

Maybe a little too golden brown....


Monday, January 21, 2013

Breakfast Muffins

IF you have today off and want to get ahead for the week, whip up a batch or two of these and put them away for quick breakfasts throughout the week....

I doubled the recipe and made a dozen
I stored them away for quick breakfasts on the go!


I was really happy with this recipe, it's very flexible.  The original recipe calls for bacon but I decided to use chopped nitrate free chicken sausages instead and also add some sauteed mushrooms.  I think it would also be good with other sauteed veggies, you wouldn't necessarily have to use meat if you don't have something suitable to use.

These reheated very nicely and I was sure happy to see them the next day when we were in a hurry to get out the door.  Bubba liked ketchup on his. 


Breakfast Muffins
makes 6 muffins
adapted from Free Coconut Recipes

1 large link of chicken sausage 

1/2 cup chopped veggies

3 eggs

2 tablespoons of melted coconut oil, olive oil or melted butter

1/4 teaspoon salt

3 tablespoons coconut flour

1/4 teaspoons baking powder

4 ounces cheddar cheese, shredded/diced

Coconut oil (for greasing muffin tin)

Preheat oven to 400 degrees.

Chop up sausage and/or veggies and fry in a skillet with coconut oil or butter. Set aside. 

Blend eggs, 2 tablespoons of oil or butter, and salt in a mixing bowl.

Add coconut flour and baking powder. Mix until there are no lumps.

Add sausage and veggies to batter along with cheese. Mix until incorporated.

Grease your muffin pan with coconut oil or use paper inserts.

Pour batter into muffin tin and bake for 15 minutes.

Print this recipe - Breakfast Muffins

Friday, January 18, 2013

Mashed Cauliflower

If you haven’t tried this, I think you’ll really like it, and to be honest, my family can’t even tell the difference between this and mashed potatoes.  If you’re used to making mashed potatoes, this recipe is basically the same thing – if you’d rather use milk/butter or sour cream or mashed garlic whatever you prefer to make these – then just add what you’d like until you get the texture and flavor you want. 


Mashed Cauliflower
Makes about 4 servings

One head cauliflower, chopped
1/2 cup grated parmesan cheese
1/4 cup butter
2-4 oz cream cheese
Salt and pepper to taste


In large saucepan, add cauliflower and just cover with water, boil covered, about 10-15 minutes, until tender.  Drain thoroughly.  Mash cauliflower with hand masher on low heat (to help evaporate any extra liquid).

Add the cheese and butter and mix until well combined.

If you prefer them nice and smooth, mix with a food processor or an immersion blender.

And if you like it spicy, there's nothing stopping you from adding chopped chilies to this recipe!
 
1/2 cup serving = 1 veggie and maybe about 1/2 a dairy serving

Wednesday, January 16, 2013

Almond Flour Banana Nut Bread

Like the background?
I would like to give a big THANK YOU to Trena H. for this recipe. 
The biggest problem you will have with these is hiding them from your family.  If you make extra, freeze a few to stash in your freezer and defrost for breakfast another time.

Almond flour is okay for Stage 1.

Almond Flour Banana Nut Bread
3 cups almond flour (I used Bob's Red Mill)
1 tsp. baking soda
1/2 tsp. sea salt or kosher salt
1/2 tsp. baking powder
3 eggs
2-3 very ripe medium bananas, mashed
1/2 cup agave
1/4 cup coconut oil
1 T. vanilla extract
1 cup chopped pecans or walnuts

Preheat oven to 350 degrees.
Grease either a 12-cup muffin tin or a loaf pan with butter.
Mix dry ingredients in a large bowl; mix wet ingredients in a medium bowl (in the order listed). Add wet mixture to dry mixture; stir in nuts. Transfer to prepared pan.
Bake muffins for about 20-25 minutes or bake the loaf for about 35-40 minutes. Let cool in pan for about 5-10 minutes. Remove from pan and cool on wire rack.

 
So what do you think? 
I'd say 1/2 serving of fruit and 1 serving of fat per muffin. 
But I'm totally guessing here.


Print this recipe:  Almond Flour Banana Nut Bread

Monday, January 14, 2013

Roasted Veggies

On P10 you will find yourself spending a lot of quality time with your (possibly new) friend the vegetable.  This recipe is simple, quick and very tasty.  There are many different combinations you can try.  This recipe is great for all Stages of P10.

Oooohhhh....I shouldn't forget to mention that if you dice red onion up very small and toss it into the recipe, the little red onions bits crisp up and taste like....bacon bits.  At least I think so. 

This would make a great side dish - or throw them onto your salad - or dot them with goat cheese and enjoy.


Ingredients

Olive oil

Regular salt or kosher salt
Note:  try different types of seasonings, like Chinese five spice, garlic salt, soy sauce, balsamic vinegar, curry powder, thyme, cumin, etc.

3 or more cups of any kind of veggie you like or a combination: 
     asparagus (cut 1 inch off bottom)
     green beans, broccoli florets, cauliflower florets,
     Brussels sprouts (cut off bottom core and then cut in half),
     chunks of zucchini or squash,
     diced potatoes or sweet potatoes,
     onions sliced or diced
     mushrooms, clean and halved

Directions

Preheat oven to 450.

Make sure the veggies are clean and DRY. 

Drizzle about 2 tablespoons olive oil on the baking sheet.  Then spread the veggies out on the sheet and drizzle with another 2 tablespoons of olive oil and sprinkle with salt or some other seasoning.  Use your hands or utensils to toss and mix it all together and then distribute it all evenly on the baking sheet. - OR combine the veggies, oil and seasoning in a ziplock bag and go to town with it.

Roast for 15 to 20 minutes, flip the veggies over halfway through cooking.  They will be brown and crispy when they are done.  Keep an eye on them as cooking times vary.

Asparagus is great with a little squeeze of lemon juice or a sprinkling of parmesan cheese before serving.

If you have something else in the oven that needs a lower temp, this recipe will still work, just cook the veggies longer...

1/2 cup of cooked vegetables = 1 serving

Monday, January 7, 2013

Happy New You!

Exactly one year ago today, January 7, 2012 – I started The Perfect 10 Diet.  What a journey, what a time of learning and growing (mentally, not physically!) and mostly, finding out what works for me and what doesn’t. 


I’m far from done.  During 2012 I lost 28 pounds following The Perfect 10 Diet and I would like to keep losing.  No, I didn’t do it perfectly – the scale went up and down along with the rest of my life.  As you may have figured out by now, P10 is not a quick fix instant cure-all.  It took a while to put the weight on and it’ll take a while to take it back off.    BUT – this is the best, healthiest and least complicated lifestyle I’ve ever tried.  And even when you’re not 100% following P10 it’s with you in the back of your head for good – now that you know WHAT you know, it’ll stick with you.  

For those who don’t know much about me, let me share.  I’m a regular person.  I work 40+ hours a week as an Executive Assistant/Office Manager for a very small but extremely busy office.  I’m not in advertising, I’m not a dietician, a doctor or an expert on anything.  I started the blog because so many of us wanted some guidance on what to eat and what to try and how to make the P10 diet work for us.  I’m going through a serious case of ‘blog envy’ right now.  There are many bloggers I follow who are lucky enough to work at home, on their blogs, experimenting with recipes and getting extra education about nutrition and all that fun happy stuff.  Their blogs rock hardcore and I am happy that they are able to do this because they are able to find out the info that I don’t have the time or energy to do.  I really wish I could do more for all of you.  You’re just gonna have to put up with my best efforts and hang in there with me.  I'm not cooking all the time now so I don't have as much to share - so send me some recipes you'd like for me to post!

If you’re still with me, let’s review:

What have I lost?
1.  weight;
2.  midnight snacking;
3.  bad complexion;
4.  insomnia;
5.  feeling constantly exhausted;
6.  feeling continually emotional and depressed; and
7.  I’ve stopped wanting to throw rocks at skinny people.

What have I gained?
1.  a new respect for food and what’s in it;
2.  an appreciation for working out and how necessary it is to do;
3.  a great night’s sleep;
4.  energy to get stuff done and energy leftover to do fun stuff;
5.  a new appreciation for taking care of myself;
6.  a steady, calm positive attitude; and
7.  bruises from having strangers throwing rocks at me (what’s that all about?)

So…Happy New Me!   Happy New You!  - HAPPY NEW US!

If you get started now you can look back in a year and say ‘look how far I’ve come’.
On my cell phone I have a picture I took on the evening of January 6, 2012…I told myself that would be the last picture in which I’d ever look like that.  I look at it once in a while and remember what it felt like and I don’t want to feel like that ever again. 

The Perfect 10 Diet won’t make you a supermodel, you won’t magically grow cornrows and look like Bo Derek – but you WILL, you WILL, you WILL feel better – and it is very much worth it to keep going, get back on it and try again. 

ONE MORE THING – something else I’ve gained while following The Perfect 10 Diet – getting to know and work together with all of you!  Thanks for your questions and discussions and hanging in there with me as we go through this together.

So, leave a comment – HOW FAR HAVE YOU COME on your P10 journey? 
And don’t forget to join us on The Perfect 10 Diet Recipes Facebook Page.