Thursday, May 31, 2012

Roasted Broccoli With Shrimp

This is a quick and easy dinner to get on the table.  Don't be put off by the seasonings - if you don't have these then use something else like garlic or five spice powder or curry or Old Bay seasoning - it is what it is.  And adjust the spiciness according to your tastes (Susie likes it hot - I like it not!) 

This is great over salad greens or Cauliflower Rice.

Print this recipe:  Roasted Broccoli with Shrimp

Roasted Broccoli With Shrimp
makes 4 servings  

2 pounds broccoli cut into bite-size florets

4 tablespoons ( 1/4 cup) extra virgin olive oil

1 teaspoon whole coriander seeds 

1 teaspoon whole cumin seeds

1 1/2 teaspoons kosher salt
1 teaspoon freshly ground black pepper
1/8 teaspoon hot chili powder
1 pound large shrimp, shelled and deveined
1 1/4 teaspoons lemon zest (from 1 large lemon) 
Lemon wedges, for serving

Preheat oven to 425 degrees. In a large bowl, toss broccoli with 2 tablespoons oil, coriander, cumin, 1 teaspoon salt, 1/2 teaspoon pepper and chili powder. In a separate bowl, combine shrimp, remaining 2 tablespoons oil, lemon zest, remaining 1/2 teaspoon salt and remaining 1/2 teaspoon pepper.  

Spread broccoli in a single layer on a baking sheet. Roast for 10 minutes. Add shrimp to baking sheet and toss with broccoli. Roast, tossing once halfway through, until shrimp are just opaque and broccoli is tender and golden around edges, about 10 minutes more. Serve with lemon wedges, or squeeze lemon juice all over shrimp and broccoli just before serving.

Wednesday, May 30, 2012

Pan-Seared Salmon with Ponzu Spinach

This healthy salmon and spinach dish uses few ingredients (salmon, spinach, ponzu sauce, and garlic), involves one non-stick sauté pan, and cooks in under 10 minutes.

Ponzu sauce can be found in the Asian section of your grocery store.  It’s a combination of soy sauce, rice vinegar, citrus and dashi broth.  I’d show you the recipe, but let’s face it, if you can’t find ponzu you’re sure as heck not gonna find dashi!

Print this recipe:  Pan-Seared Salmon with Ponzu Spinach

Pan-Seared Salmon with Ponzu Spinach
makes 4 servings
recipe adapted from Big Bold Beautiful Food

4 salmon fillets, thawed

coconut or olive oil

salt and pepper

2 cloves garlic, minced

1 bag of spinach

1/4 cup ponzu sauce


Pat the fillets dry on both sides. Brush the top with oil and season with salt and pepper.

Take the spinach out the bag. Go through the spinach and remove any big stems and any pieces that are not fresh. Rinse in a colander or salad spinner.

Mince or crush the garlic.

Heat a non-stick skillet over medium-high heat until it's hot. You know it's hot if you hold your hand over the skillet and you can only hold it there for 2-3 seconds, or you can wet your hand and flick water into the pan. If water sizzles and evaporates when it hits the pan, it's hot.

When the skillet is hot, add the salmon fillets, oiled side down, making sure the fillets are not touching each other and there is some air circulation in between them. Depending on how thick they are, you'll cook them a few minutes on one side (see note), until the bottom edges get opaque. While the bottom side is cooking, brush the top side with oil and season with salt and pepper.

Flip over and let that side cook for a few minutes until center of fish is just opaque (see note). Remove from pan and set aside.

Add 1 tablespoon of oil into the skillet and swirl around. Add garlic, stir around once, and add spinach right away. If you can't fit all the spinach at once, add as much as you can, stir around until it wilts and then add the rest. Add the ponzu sauce and it will help the spinach wilt and cook. When all the spinach is wilted, turn off the heat.

Put some of the spinach on a plate and place the salmon on top of it.


Note:
  • If you have a fillet that's about 1 1/2 inch thick, you'd cook it about 6 minutes on one side, flip it and cook for 4 minutes on the other side.
  • If you have a fillet that's thinner, cook it less.
  • You should take the fish off the heat when it's almost opaque but still a little translucent in the center. To check the color inside, stick a knife in the center and gently pull apart the flesh. The fish will continue cooking in its own heat when you take it off the stove and become fully opaque.

Tuesday, May 29, 2012

Mexican-Style Twice Baked Potatoes

Another potato skin recipe, but one that is good for you and your family will love.  You won’t have to ‘enhance’ any ingredients in this one.  Remember, on P10, potatoes are a ‘once in a while’ veggie.  You could add more beans and less of the potato pulp if desired.

These are great alternative to your typical baked potato, and they don't take much more time to make either. They can even be made ahead, and baked when you are ready to eat. 

These would be great on their own as dinner, or as a side dish to a small steak or large salad.

Print this recipe:  Mexican-Style Twice Baked Potatoes


Mexican-Style Twice Baked Potatoes
makes 4 dinner servings or 8 side dish servings
Recipe courtesy of The Baking Beauties

4 large russet potatoes (about 8 ounces each), washed & scrubbed

 3/4 cup refried beans

 2 green onions (white and green parts), thinly sliced

 1 tablespoon taco seasoning (organic if you have it)

 salt & freshly ground pepper to taste

 3/4 cup mild or medium salsa

 1 cup shredded cheddar cheese

 sour cream and/or guacamole (optional)


Preheat the oven to 450 degrees F.

Prick the potatoes with a fork and bake in the center of the oven for 1 hour, or until tender. Reduce the heat to 375 degrees F and let the potatoes cool at room temperature for about 15 minutes before handling.

(Alternatively, you could preheat the oven to 375 degrees and then prick the potatoes and zap them in the microwave.)

When the potatoes are cool enough to handle, cut in half lengthwise and scoop out the potato pulp, transferring to a small bowl and leaving a shell about 1/4 inch thick.

Add the refried beans, scallions, taco seasoning, salt and pepper to the potato pulp; mash well to thoroughly blend. Stuff the mixture back into the potato halves and transfer to an ungreased baking sheet. (At this point, the potatoes can be covered with plastic wrap and refrigerated for up to 24 hours before continuing with the recipe.)

Top each potato half with about 1 1/2 tablespoons of salsa. Bake in the center of the oven, about 15 minutes (about 20 minutes if they have been refrigerated), or until heated through. Sprinkle each half with 2 tablespoons of the cheese. Return to oven and bake until the cheese is melted, about 5 minutes.

Serve at once, with the toppings (if desired).

Friday, May 25, 2012

Protein Pudding


When I saw this recipe on Maria's Nutritious and Delicious Journal, I wasn't sure what to think...I love eggs and I love pudding, but come on, egg pudding?  One of Maria's sons hates eggs but will eat this.  Several of you have said how much they dislike eggs but I think this could be a winner-winner hard boiled dinner breakfast.

I was happily surprised to find out that I liked it a lot and the Kid has been making moves towards the leftovers, probably wondering if it's something healthy and nutritious or really just some innocent pudding waiting to be eaten.

I made only half this recipe to be sure I liked it before I committed all those eggs to it.  I also put some cocoa powder in it because some of us gotsta have the chocolate in it. 

The sweetener is really whatever you like best and the amount that you like, I used agave nectar and that worked just fine. 

I couldn't really tell you servings because it would just depend on how hungry you are and how much you want to eat but this is also a lovely way to 'enhance' eggs for the family and they would be none the wiser...


Protein Pudding

10 hard boiled eggs

1 can (full fat) coconut milk

1-2 teaspoons stevia glycerite (or other sweetener to desired taste)

1-3 teaspoons cinnamon

2 teaspoons vanilla extract (or any other complimentary flavor)


optional - 2 tablespoons cocoa powder


Peel the eggs. Place all the ingredients in a blender, liquid first, and puree until VERY smooth.   Store in an airtight container.

Thursday, May 24, 2012

Beef-a-Roni

The texture and taste of this awesome dish was like a big bowl of hearty spaghetti but without the noodles!  It was very filling and easy to make. 

Oh, and after talking with my friend Karen, I’ve now decided that secret ingredients should be referred to as ‘enhanced’ rather than ‘disguised’.  I was telling her about how Bubba, the enemy of all things eggplant, ate this and loved it and never once even noticed the eggplant in it.

This could also be very versatile.  You could use zucchini and yellow squash in place of the eggplant.  You could sub ground chicken or turkey for the meat.

Oh, remember the Pepperitas recipe?  Bubba decided to scoop some of this mixture into his peppers to take for lunch.  (he drained off some of the sauce first).

This makes a lot so I bet you could freeze the extra if it doesn’t get eaten before then…

Print this recipe:  Beef-a-Roni


Beef-a-Roni
makes 6 servings

1 1/2 lbs. ground hamburger or turkey

1 medium onion, diced

1/2 green pepper, diced

3 cups eggplant, cut into cubes

32 oz  marinara sauce, no sugar/natural

1-2 cloves of garlic, minced or crushed

salt & pepper or Trader Joe’s 21 Seasoning Salute

optional:  mozzarella or parmesan cheese


Peel and cube the eggplant into dice-sized pieces. Place in a large pan with marinara and garlic. Cover and simmer for 10 minutes or until the eggplant is soft.

Brown the meat, onion and green pepper in skillet. Drain off any excess fat and then add the meat into the sauce mixture.   Cook over medium-low heat, covered, for 10-15 minutes. Stir occasionally. 

Season with salt, pepper or any other seasonings you’d like.
Top with cheese.

Wednesday, May 23, 2012

Pumpkin Hummus

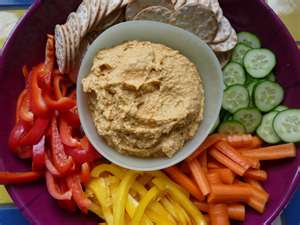
This recipe is an old WW standby and it is really easy to make.  I can imagine all kinds of lovely seasonings you could add to get different flavors, curry comes to mind...or you could spice it up with nutmeg.  You could serve this with pita chips (Stages 2-3 only please) or different veggies.

The dip has the familiar tahini and garlic taste of traditional hummus, but lacks the slight density of the usual chickpeas. It’s light, flavorful and delicious. It makes a fairly large batch, but will store well for a few days in the fridge, if it lasts that long.

Print this recipe:  Pumpkin Hummus

Pumpkin Hummus
makes about 2 cups

2 tablespoons tahini
2 tablespoons lemon or lime juice
1 tsp ground cumin
3/4 teaspoon salt
1/8 teaspoon ground red pepper
1 (15-ounce) can pumpkin puree (NOT pie filling)
1 garlic clove, smashed

In a food processor, combine all ingredients and puree until very smooth. Add a bit of extra lemon juice or olive oil if the mixture is too thick to blend thoroughly.


Tuesday, May 22, 2012

Flaxseed Wrap


Breakfast Burrito!!

This versatile and easy wrap recipe is courtesy of Dr. William Davis, author of “Wheat Belly”.  This recipe is located in Appendix B, page 244 of the hardback and reprinted with his gracious permission.

I MISS tortillas...wraps...sandwiches...etc.  I've decided to stay on Stage 1 and stay away from grains so whenever I can do a cheater version and it also tastes good then it's a winner.

I made a breakfast burrito out of this wrap, but you could use it for any meal in a number of ways and in all kinds of dishes.  This is a sturdy and flexible wrap.  I guess you could call it a flat version of the MIM.

The wraps can be refrigerated for a few days or even frozen.  The original recipe suggests using vegetable juices in place of the water to make different variations.  I wonder how this would turn out by removing the spices and adding cocoa powder and sweetener...and maybe fill it with cream cheese....oh boy, that I've gotta try!  Or maybe even toast and slice it to make chips?

Print this recipe:  Flaxseed Wrap
 
Flaxseed Wrap
Makes 1 wrap

3 tablespoons ground flaxseeds
1/4 teaspoon baking powder
1/4 teaspoon onion powder
1/4 teaspoon paprika
pinch of sea salt or celery salt
1 tablespoon coconut oil melted (plus extra to grease the dish)
1 tablespoon water
1 large egg

Mix all the dry ingredients in a bowl; stir in the coconut oil, egg and water until blended.

Grease a microwave-safe glass or plastic pie pan with coconut oil.  Pour the batter and spread evenly over the bottom.  Microwave on high for 2-3 minutes until cooked.  Let cool about 5 minutes.

To remove, lift up an edge with a spatula, if it sticks, use a pancake turner to gently loosen from the pan; flip the wrap over and top with desired ingredients.


Monday, May 21, 2012

Sausage and Brussels Sprouts

Lately I've been trying to find really good nitrate free yummy sausage.  I've found some here and there, or at least as close as you can get.  Aidell's has some great chicken sausages; I've also seen some nitrate free hot dogs at Trader Joe's. 

This recipe is a quick and easy one pot recipe; I've made it a few times and made it slightly different each time.  You could either put the Brussels sprouts through the food processor or chop them up - I think chopping them is better, when I put them through the food processor I ended up with ground sprouts, it still tasted good but it was a little weird texture-wise.

Print this recipe:  Sausage and Brussels Sprouts

Sausage and Brussels Sprouts
makes 4 servings

2 tablespoons butter
1/2 of an onion, diced
1 lb nitrate free sausage, sliced
1 lb Brussels sprouts
cheddar cheese (optional)

To prep the sprouts, cut off the cores (the butt end) and then cut them each in half.  You can either run them through the food processor or chop them up.

Melt the butter in a heavy skillet over med-high heat and start cooking the sausage.  Add the sprouts and onion to the pan and continue to cook everything, stirring occasionally, for about 8 minutes.  The sprouts will be wilted and the sausage should be warmed through.

Top with cheese, if desired, and serve.

Friday, May 18, 2012

Pinterest, Sharing and Support

Just a quick note to let you know that I've updated the blog a little bit.  Since the blog is mostly Stage 1, I've decided to concentrate most of my effort in that direction, because, let's face it...Stage 1 is the stage with the most questions! 

Now that doesn't mean I don't care about Stages 2 and 3; but anything okay for Stage 1 is okay for Stages 2 and 3 so really, you're not left out!

Also, I've added a new label 'grain-free' because that's important to me and probably to most of you. 

Oh, back to the subject matter - I'm on Pinterest but I'll be honest, I'm not too swoooft with it so please feel free to Pin It on any recipes that you think are good and share them with others.  I'm trying to figure out how to make a 'Pin It' button on this blog but it's a bit beyond me right now.

Bubba and Joley
And don't be strangers - feel free to comment or share your ideas as well.  I love hearing from people and I think we all do better if we have a support team to do this together, because it's not like we can all meet every Saturday morning, weigh in and then have a meeting and pass out stickers!!

And don't forget to join the blog's page on Facebook:  The Perfect 10 Diet Recipes

I'm so happy work with all of you and I enjoy our fellowship!  God bless!         

Joley H.


Pepperitas!!

The other night Bubba was trying to think of what to put in his lunch for the next day.  I hadn't made any bread he could use and he was tired of lettuce wraps.  He doesn't have a lot of time for lunch so he prefers to eat something easy and sandwich-like.


Well, lo and behold, I had a lightning flash and this cute little idea was born.  I'm sure someone else somewhere has already thought of it and done it but darnit - I'm proud of this right now and he really liked the idea and enjoyed his lunch.  

I couldn't think of a cute name so I'm calling them Pepperitas....

You'll need a bag of these - sweet mini peppers - they fit in the palm of your hand:


 And, whatever you prefer as a filling - here are some ideas to get you started....

- cream cheese and veggies
- slices of meat and cheese
- chicken salad
- tuna salad
- what else sounds good to you?

Slice off the top of the pepper and shake out the seeds, then fill with whatever you'd like.

We wrapped them in foil so the toppings wouldn't fall out and they made a great lunch - but you could make these into a snack or an appetizer.

What do you think?


These contain: cabbage and veggies; turkey, cheese and almonds; and chicken salad

Thursday, May 17, 2012

Slow Cooker White Chili


This is an old WW standby and a really delicious 'white' chili on a cold day. 

This makes a LOT so portion some of it into freezer containers and freeze for another day.


Slow Cooker White Chili
8 servings (1 1/2 cups)

for the crockpot:
4 cups chicken broth
1 pound skinless boneless chicken breasts, cut into 1 inch pieces
2 (15oz)  cans Great Northern beans, drained and rinsed
2 med. zucchini diced
2 onions chopped
1 tbs. ground cumin
2 garlic cloves, minced
1 tsp. chili powder

for serving:
1 cup frozen corn kernels
1/2 cup sour cream
1/2 tsp. salt and pepper or to taste


Mix broth, chicken, beans, zucchini, onions, spices cook on high in slow cooker for 3 1/2 hours (or on low all day)

Stir in corn and sour cream, heat through, season with salt and pepper and serve.

Wednesday, May 16, 2012

Crockpot Roast Chicken

Many times you probably run screaming into the grocery store to pick up a rotisserie chicken just so you'll have something for dinner.  I hate the grocery store at dinner time because it's so crowded and everyone's fighting over those darn chickens. 

If you have a large crockpot, you can make your OWN chicken, no fuss, no fights and no extra weird things in the seasonings (have you read the labels on the store cooked chickens?  yeeeesh!) 

I love my crockpot, because it works all day cooking so I don't have to.  Right now, it's got chopped cauliflower and water cooking all day so when I get home all I have to do is drain and mash it up and I've got a crust started for Wheat Free Pizza.


Crockpot Roast Chicken

3-4 lb chicken
Olive oil
Seasoned salt or lemon pepper or garlic salt, etc.
Tin foil


Clean chicken inside and out. 

Rub with olive oil and sprinkle with seasonings.

Rub the inside of crockpot with olive oil – Do NOT put any water/liquid in the crockpot.

Roll up about 6 wads of tin foil into balls and put them in the bottom of the crockpot. 
(Give them a good drizzle of olive oil as well, it helps). 
The chicken is going to ‘sit’ on the tin foil balls to keep it out of the juices.

Put chicken back side down on top of the foil balls.

Cover and cook on HIGH for 4-6 hours. 
If you have to leave it in for 8 hours it will still be fine.  The chicken just falls off the bone.

Tuesday, May 15, 2012

7-Layer Mediterranean Dip

I know I said that I would aspire to make any recipes that I post ahead of time but I have yet to try this 7-layer dip, which could also pass as a very hearty salad.  My niece and I are the only ones who like this sort of stuff so I haven’t gotten a chance to make it. 


Use whatever dish makes you happy...
 I saw this recipe on Circle B Kitchen and I think you'll just love it.  If there's something in it you don't care for (cough*olives*cough) then try something else like roasted red peppers, artichoke hearts, cannellini  beans and any number of veggies. 

Yes, it’s a play on the Mexican seven layer dip – but Mediterranean style - with layers of hummus, cucumbers, lettuce, tomatoes, kalamata olives, red onion and feta cheese. 

You could pair this with pita chips (see recipe below, Stage 2 only please) but you could also heap it on a plate and enjoy on its own.

Print this recipe:  7-Layer Mediterranean Dip


7-Layer Mediterranean Dip
Serves 8 as an appetizer

1 1/2 cups hummus

3/4 cup peeled and diced cucumbers

3/4 cup shredded romaine lettuce

3/4 cup diced red onions

3/4 cup diced tomatoes

1/2 cup diced kalamata olives

1 cup crumbled feta cheese

pita chips, for dipping (see Note)


In a 9-by-13 baking dish, spread the hummus in an even layer. Add layers in the following order: cucumber, romaine, onions, tomatoes, olives and feta cheese. Serve with pita chips.

PITA CHIPS: If you want to make your own pita chips, brush 8 pita rounds with a little olive oil and cut into 8 triangles each.   Sprinkle with a little cumin, paprika, salt and pepper, and bake in a 375° oven until golden, about 10-15 minutes. 

Monday, May 14, 2012

Breakfast Potato Skins

On P10 potatoes are a ‘once in a while’ food but you can’t beat this dish when it comes to making a big batch of them ahead of time and freezing them for a quick breakfast OR having the family help themselves instead of hovering over you and asking where their breakfast is.  And you could put whatever is good for you into these potatoes and replace that soft white inner potato mush with something snappy and healthy to start your day.

PS:  think of serving these with salsa or sour cream…

PPS:  if you are going to freeze them don't put green onions on them, they get bitter when frozen.

Print this recipe:  Breakfast Potato Skins

Breakfast Potato Skins
makes 2 servings of 2 skins each

2 medium russet potatoes
olive oil
4 eggs
2 tablespoons milk

2 tablespoons chopped nitrate free ham or ground turkey
2 tablespoons chopped onion
1/2 cup veggies chopped
salt and fresh pepper
4 tablespoons cheddar cheese

Pierce potato with a fork a few times all around. Place in microwave and cook about 5 minutes per potato. When finished, allow to cool enough to handle. Cut potatoes in half horizontally. Scoop out potatoes leaving about 1/4 inch thick wall. 

In a large bowl, whisk eggs, milk, salt and pepper. Add onion, veggies and meat and mix well. Oil a medium skillet and cook the eggs, mixing often.

Heat oven to 450°. Lightly rub potato skins on both sides with olive oil. Season both sides with salt and pepper. Fill with eggs and top each one with 1 tablespoon cheese. Place on a baking sheet and bake 5-10 minutes or until cheese is melted.

FREEZING FOR LATER – let them cool, wrap individually and freeze.  To reheat, zap in microwave for about a minute and a half on high.

Friday, May 11, 2012

Tortilla and Black Bean Pie


Lo siento, tengo mucho tarde para el Cinco de Mayo - but, it's never too late to celebrate with this absolutely delicious Mexican casserole.  This is one of our knock down drag out favorite meals.  Now, because it contains flour tortillas, this is not suitable for P10 Stage 1 and those of you who are not eating grains - but I'm thinking you could substitute a flaxseed wrap in place of the tortillas - just not sure how that would taste?

Depending on what kind of meat your family likes, this can be very versatile or you can make it vegetarian by just adding an extra can of black beans. 

Print this recipe:  Tortilla and Black Bean Pie


Tortilla and Black Bean Pie
makes 6-8 servings

 4 (9-inch) flour tortillas
1 large onion, diced
2 cloves garlic, minced
3 tablespoons taco seasoning
1 lb ground beef/turkey (OR use an extra can of black beans)
1 (15-ounce) can black beans, drained and rinsed
1 (10-ounce) bag frozen corn
1 1/2 cups chicken broth

1 (15-ounce) can refried beans
4 green onions, thinly sliced, plus more for garnish
cilantro, chopped 
8 ounces cheese, shredded
salsa and sour cream, for serving

Preheat the oven to 400.

Using the bottom of the pan as a guide, use a paring knife to trim the edges of the tortillas so that they fit in a 9-inch springform pan.  

Heat the oil in a large skillet set over medium heat.  Sauté the onion and meat until no longer pink.  Add the garlic and taco seasoning, and cook until fragrant, about 30 seconds.  

Add the black beans and broth to the skillet, and bring to a boil.  Reduce heat and simmer until most of the liquid has evaporated, 8-10 minutes.  Mix in the corn and scallions and remove from heat.

Spread a layer of refried beans on each tortilla.  Then lay one of the tortillas across the bottom of the springform pan (bean side up).  Layer with 1/4 of the meat/bean mixture, and sprinkle with cheese.  Repeat 3 times, finishing with beans and cheese.  Bake until cheese is melted and the mixture is heated through, about 20-25 minutes.

Remove from oven and unmold the pie.  Garnish with remaining scallions and cilantro, and serve with sour cream and salsa.

Thursday, May 10, 2012

Asian Caramelized Broccoli


This is a quick and easy Asian side dish to throw together.  If you have soy sauce you could use it, but if you have Tamari (gluten free soy sauce) that would be even better.  It's the quick and dirty stovetop version of roasted veggies and I bet this would work with a lot of different veggies, although I have yet to try that out.


This dish cooks up best in a wide skillet with high sides or a wok, if you have one.
Once again, remember to bring anything you'll put in the skillet to room temperature or you'll just be warming it up instead of cooking it.

Print this recipe:  Asian Caramelized Broccoli

Asian Caramelized Broccoli
makes 4 servings

1 bag of broccoli florets, about 12 ounces
2 tablespoons sesame oil
2 tablespoons soy sauce or tamari

NOTE – the broccoli must be DRY or it will steam.  You can buy it prewashed like a bag of ‘broccoli wokly’ or make sure to wash and dry it completely before making this recipe.

Cut the florets into bite-sized pieces.  Make sure they are not still cold from the fridge.

Heat a skillet or wok over medium heat, add the oil.  When oil is fragrant, add all of the broccoli, tossing to coat in the oil evenly.  Leave the pan alone to allow broccoli to brown, then stir around to get brown on all sides.  You want it to appear dark and roasted all over.  Sample a piece until you decide it’s done to your taste.

Once broccoli is done, add soy sauce over the top while still on the heat, cook for another 30 seconds, tossing constantly.

Serve immediately.