Friday, August 31, 2012

Friday Flashback-Don't knock it...'til you've tried it


Welcome to another Friday Flashback!

In case you're new to the blog, here's a post from the first week the blog started, my first (but definitely not last) bit of advice regarding our favorite P10 diet - have fun and remember....Don't knock it...'til you've tried it!

Thursday, August 30, 2012

Tamari Green Beans


Someone mentioned the other day that they made Tamari Mushrooms and threw in some green beans, and once again, I was like 'why didn't I think of that?'

So I tried the same recipe but used green beans and it was really really really good.  Yes, it gets rated three 'reallys'!

Most soy sauce contains gluten (wheat) but tamari is soy sauce that is more natural and it's not too difficult to find.  If you have an Asian ingredient aisle in your grocery store, check it out.  Tamari is right next to the soy sauce.


Tamari Green Beans
makes 4 servings

2 tablespoons butter
8 ounces fresh green beans
2 cloves garlic, minced
2 teaspoons tamari
ground black pepper to taste

 
Melt the butter in frying pan over medium heat; add the beans; cook and stir about 5 minutes. Stir in the garlic; continue to cook and stir for 1 minute.

Add the tamari; cook the beans in the tamari until the liquid has evaporated, about 3 minutes. 

1/2 cup of green beans = 1 serving of veggies


Wednesday, August 29, 2012

Yogurt Hummus

A while back Kelley asked for a hummus recipe that didn't need tahini.  I think that's a great idea because to be honest, I'll buy the tahini, use it once or twice and forget about it and then have to buy more next time I need it.  Plus, when I want to buy it, I can't find it but it's on every dang shelf when I don't need it....does that happen to you?

Anywho, try this quick and lovely no tahini version of hummus.  For Stages 2/3 you could enjoy this with crackers or pita.  Those of you in Stage 1 could make a great veggie tray and use hummus instead of ranch.  Oh, and have you tried hummus in place of mayo?  As in mixing up your tuna salad with it?  That's darn good.  When I made this I even tried it with apple slices and that was not bad at all...


Yogurt Hummus (No Tahini)

15 oz can garbanzo beans drained and rinsed
3 medium garlic cloves, mashed
1 teaspoon ground cumin
3 tablespoons lemon juice
3 tablespoons extra virgin olive oil
1/4 cup Greek yogurt
Salt to taste

Before you start, mix the lemon, olive oil and yogurt in a small bowl so you won't be scrambling to measure while the food processor is running.

Add the beans, garlic and cumin to your food processor and process for 30 seconds.  Scrape down the sides with a spatula if necessary.

Then, with the machine still running pour in the olive oil, lemon juice and yogurt. Process until you get a nice creamy, smooth paste.   TASTE and then add salt, pulse to blend.

If you want it thinner, add another tablespoon of olive oil. If it is still too thick for you then add some more yogurt.

Tuesday, August 28, 2012

Cabbaroni and Cheese

This turned out to be so easy and really really good.  And it fills you up fast.  We ended up having a lot left over.  I served this up with some Open Nature sausages that I crisped up in the skillet with some olive oil.  Quick and easy!

For a fast one dish dinner, cut up cooked chicken or sausage and throw in some veggies before you bake it.


Cabbaroni and Cheese
makes 4-6 servings

3 cups cabbage, chopped (about 1/2 head)
2 1/2 cups cheddar cheese, grated
2 tablespoons half and half

Preheat oven to 350 degrees.

In a large saucepan, cover cabbage in water and bring to a boil.  Simmer for about 5 minutes. 
Drain.

Butter an 8" square baking dish, then pour in half and half.

Layer the cabbage and cheese in alternate layers.

Bake until cheese is melted (about 10-15 minutes).

Monday, August 27, 2012

Parmesan Onion Rings

Well, the recipe SAID this was supposed to be onion rings but it was more like an onion saute.  I'm not having much luck lately getting certain dishes to hold together, like Cabbage Hashbrowns and Brussels Sprout Steaks - but you know what?  It was still good and we enjoyed it.  So, don't beat yourself up if something doesn't turn out perfect...no use crying over imperfect onions...okay, I did cry but only when I was cutting it up.

The only Parmesan I had on hand was shredded so maybe it didn't stick like it should have but it did make nummy chunks of cheese amongst the savory onions, so it was all good.


Parmesan Onion Rings
makes 2 large or 4 small servings

1 medium white onion, sliced into rings
2 cloves minced garlic, pressed
2 tablespoons butter
1/3 cup Parmesan cheese, grated
Salt to taste

In a skillet, over medium-high heat, melt the butter, add the garlic and sauté for a minute or so, then add onion rings and sauté until crisp.

On a plate, spread out Parmesan.  Transfer the cooked onion rings to the plate and shake to coat with cheese.

Friday, August 24, 2012

Friday Flashback - Butter Chicken

Welcome to another Friday Flashback!

Since we're on an Indian food kick this week, I thought I'd bring back one of my favorite dishes, and according to the comments, the family will love it too.  Go forth and make you some Butter Chicken-Indian Style.  And then come back and tell me how much y'all loved it.

Have a great weekend!

Thursday, August 23, 2012

Shrimp 'Risotto'


This is one of our family's favorite recipes that has had to go 'bye bye' since we started eating on P10.  However, as I flipped through my personal cookbook (2 large three ring binders and several folders worth) I realized that I could probably revamp this recipe using Cauliflower Rice and it would still be great.  It's based on an old WW recipe.

And just 'cause I didn't list any veggies doesn't mean you couldn't add some if you wanted to round this out a little bit!  This is a great way to use up any extra Cauliflower Rice you have lying around.


Shrimp Risotto
makes 4 servings

2 cups Cauliflower Rice

2 cloves minced or crushed garlic

2 tablespoons butter

1 pound cooked shrimp, thawed

1/4 cup Parmesan cheese


Melt the butter and add the garlic, cook until fragrant.  Then stir in the Cauliflower Rice and mix together and continue heating until warmed through.  Stir in cooked shrimp and heat for a few minutes, then finish the dish by adding the Parmesan cheese.

Wednesday, August 22, 2012

Turmeric Cabbage and Mushrooms

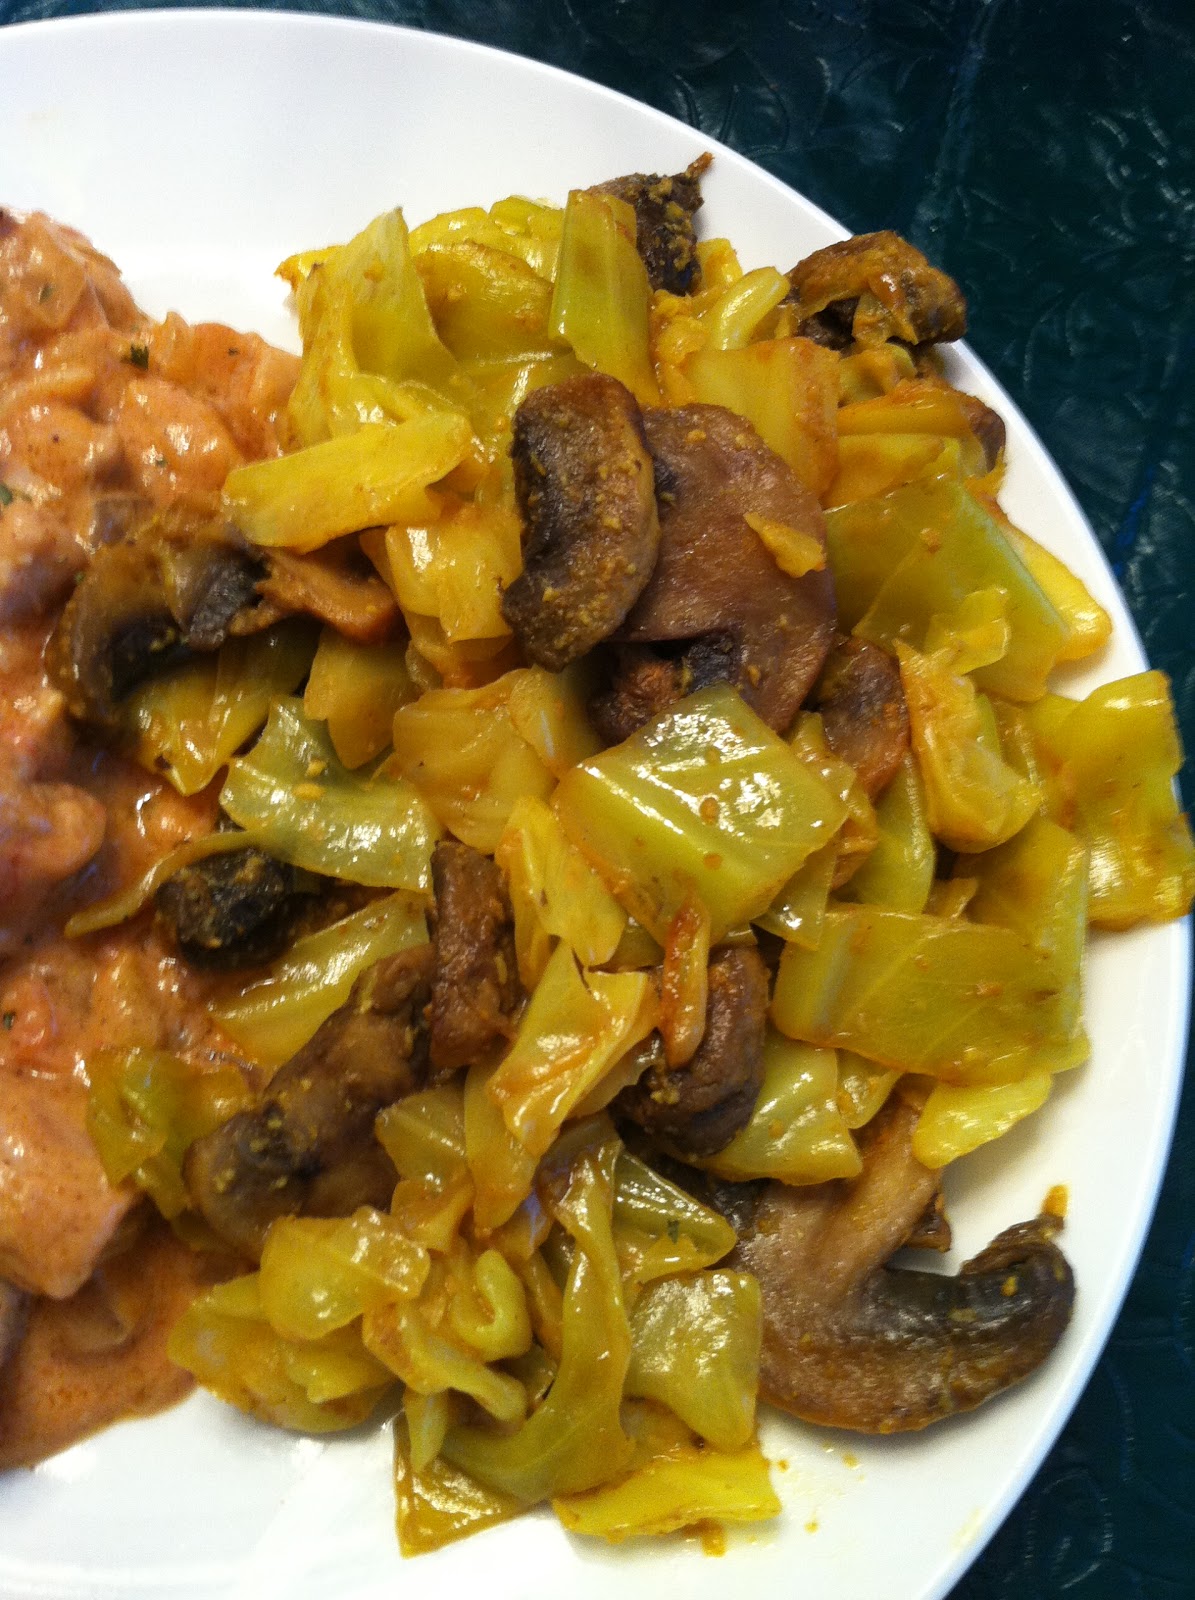
This is a quick and easy side dish to any Indian dinner.  I think next time I might try it with cauliflower rather than cabbage, as you can see it's a flexible recipe.

If you're saying 'oh geez do I have to go out and buy turmeric or can I substitute something else?' then I'm telling you that yes, you should have turmeric as a staple spice in your kitchen...the smell and flavor really make a difference in the dishes you use it in. 


Turmeric Cabbage and Mushrooms
makes 4-6 servings

1 small head cabbage (or 1/2 large head)
8 oz mushrooms, sliced
1 tablespoon olive oil or butter
1 teaspoon turmeric
1 teaspoon ground cumin
4 cloves garlic, minced
1/4 teaspoon ground ginger
1/2 tablespoon lemon juice
1 cup chopped cilantro


served alongside Almond Butter Chicken

Cut the cabbage into bite sized chunks and slice the mushrooms.

Heat the oil over medium heat in a large pot and add the turmeric and cumin. Fry 30 seconds.

Add the vegetables, garlic, and ginger and stir to coat.

Toss in a couple tablespoons of water and cover.

Cook over medium heat about 20 minutes, or until tender.

Add lemon juice and cilantro.   Season to taste with salt and pepper.

Tuesday, August 21, 2012

Almond Butter Chicken

I'll never forget the first time I saw 'peanut butter chicken'...I was at a baby shower and the California hostess served chicken skewers with peanut sauce and I thought she'd lost her mind (I was raised in Iowa, pigs and peanut butter don't mix...)

But I tried one and since then, I've always loved the taste that tastes great together.  And as you may know, my new love is Indian food.  I found a peanut butter chicken recipe and I have converted it to P10 use and added a few tweaks of my own.  Of course, you can always feel free to spice it up or down.  If you use almond milk instead of water, you will need to add more spices to feel the heat.  I also used chicken thighs instead of breasts to get that richer dark meat taste.  Sweeten to taste as almond butter doesn't have all the added sugar that peanut butter has.


Almond Butter Chicken
makes 4-6 servings

1 lb boneless or whole chicken, cut into bite-sized pieces
1/4 cup almond butter
4 oz can of green chilies, drained
2 medium onions, sliced
2 tomatoes, chopped
1/2 teaspoon salt
1 teaspoon sweetener equivalent
3 tablespoons butter or coconut oil
3/4 cup water or almond milk
chili powder or cayenne pepper, something spicy to kick it up

Heat oil in a saucepan over medium heat and fry chicken pieces until golden brown.

Add the tomatoes, chilies, onions, salt and sweetender. Stir-fry until the onions become soft.

Add almond butter and mix well. Add water/milk gradually until it forms a sauce. Lower heat and simmer for about 20 minutes or until chicken is done.

I served this with a side of Turmeric Cabbage and Mushrooms - stay tuned for that recipe tomorrow. 

Monday, August 20, 2012

Broccoli Pie

This addicting pie was great for dinner and it was even better for breakfast the next day.   It was quick to throw together and then you can get in some exercise while it's baking.  You could change this up in many ways, using different cheeses or spices or seasonings.  You could also portion out the slices and freeze for quick dinners or breakfasts.

You could use either frozen broccoli or regular broccoli, just put in microwavable bowl with a little water, cover and cook until steamed through.

And for pete's sake - DON'T FORGET TO GREASE THE PLATE...don't be like me....


Broccoli Pie
makes 6-8 servings

3 cups/10 ounces chopped broccoli, cooked and well drained
1 onion, chopped
8 ounces cheddar cheese, shredded
6 eggs
1 cup half and half
salt and pepper

Use oil or butter to coat a large glass pie plate.

Put the broccoli, onion and cheese in the bottom of the plate.

Combine the eggs, half and half and salt and pepper in a separate bowl and pour evenly over the broccoli mixture.

Bake at 350 for 35 minutes, until a knife inserted in the center comes out clean.
Let stand 10 minutes before cutting.

Friday, August 17, 2012

Friday Flashback - Tamari Mushrooms

Here's another oldie but goodie that we need to take another look at!

People, I LOVE to hear feedback when you try the recipes, so please feel free to leave a comment on the blog or on the Facebook site.  And I really appreciate hearing the ways you can make the recipes better!  I was jazzed when Karen commented that she made these and she added green beans to the recipe and that was a big hit!  I never even thought of that and now I'm totally going to try that next time.

Quick and easy and good for you - Tamari Mushrooms

Thursday, August 16, 2012

Dark Chocolate and Coconut Dessert Sauce


Sliced apples and bananas with
Dark Chocolate and Coconut Dessert Sauce
 This is a recipe I found on the Whole Foods website.  And this is good timing too, because lately I just seem to need an extra bit of chocolate...sometimes life is like that!  And, oh yes, it was totally worth it.

Don't be fooled by 'makes one cup' because I cut up a plate full of apples and bananas and we still have plenty left over....I also think this would be awesome over pancakes.  How about serving it along with either Orange Cake or Mexican Chocolate Coffee Cake...oh let's just face it.  I'd probably put this on vegetables if I thought my family wouldn't stage an intervention.  I think I'll try this over Greek yogurt.

Notes and stuff: 

use at least 60% cacao dark chocolate - I used dark chocolate chips

Double boiler - no need for fancy equipment, just use a saucepan with boiling water and set a glass/ceramic bowl on top (like Corell - remember that?)  I still have one:


Dark Chocolate and Coconut Dessert Sauce
Makes about 1 cup


8 ounces dark chocolate (at least 60% cacao), roughly chopped
1 cup coconut milk, canned

Gently melt chocolate in the top of a double boiler until smooth; remove from the heat. Meanwhile, put coconut milk into a small pot over medium heat and keep stirring it in the pan until it steams, don't let it boil.  Remove from the heat immediately and let it cool for a few minutes. Then slowly and gently mix the milk into the bowl of chocolate until smooth and well combined.  

If you are going to use it shortly, set the bowl back on top of the warm water in the saucepan to keep the sauce warm and drizzly.

Store in an airtight container in the refrigerator for up to two weeks.
Let it cool before putting in the fridge.
To reheat, gently stir the sauce on low heat gently until it is warm and serve.

Nutrition:  per serving (about 2 Tbsp): 90 calories (70 from fat), 7g total fat, 5g saturated fat, 1g protein, 9g total carbohydrate (1g dietary fiber, 8g sugar), 0mg cholesterol, 5mg sodium

So good...so warm...so lovely....

Wednesday, August 15, 2012

Sausage Skillet Supper

Hands down, this is my family’s favorite meal ever.  If my nieces find out I’m making it they will beg for a ride over to our house to eat dinner with us.  Of course, I’m talking about the ‘before P10’ version made with extra taters, processed cheese and kielbasa. 

The other day I got to missing this easy to make and delicious dish so I sat down and converted it as best I could to P10 and it was still very good.  If you've got to make this stretch and the rest of the family isn't doing P10 then throw in an extra potato if needed.

One of the things I miss most is sausage – and those things can be loaded with really not good for you nitrates and crap.  So I’ll now do a little plug for Open Nature, available at Safeway/Vons stores.  Open Nature sausages are nitrate free and their ingredient list isn’t scary at all and thanks to them, I’ve been able to indulge in sausages once in a while. 


Sausage Skillet Supper
makes 4-6 servings

3 tablespoons olive oil or butter
1 large potato, peeled and diced
1 large onion, diced
1 green pepper, diced
1 tablespoon dried oregano
1/2 tablespoon pepper
3 cups (about 10 oz) broccoli florets
12 oz Open Nature sausage
1 cup cheddar cheese, shredded/grated

Heat oil in a large pan over medium high heat, add potatoes, onions, green pepper, oregano and black pepper.  Cover and cook for about 8 minutes, stirring occasionally.

While the potatoes are cooking I like to cut the broccoli into bite-sized pieces and slice up the sausages.

Stir in the broccoli and sausage, I like to flip the mixture to move the potatoes on top and the broccoli and sausage underneath.  Turn down the heat to medium, cover and cook for about 5 minutes.  Top with cheese, turn off heat and cover until cheese melts.

Scoop into bowls and let it cool for a few minutes because it will be super hot.

Tuesday, August 14, 2012

Pepper Rings


Pepper Rings with broken yolks (on purpose!)

The other day Cindy posted a picture she got from a blog that just looked so adorable and such a neat idea too.  Bubba loves peppers so I went out and bought some and then made these for him; he really enjoyed them.


Pepper Rings

1 very large bell pepper, green, yellow or red
large eggs
Salt and pepper
Butter for frying

Slice pepper into rings.

Melt 1 tablespoon butter in pan, set rings in pan and let them cook until softened, then flip them over.

Crack an egg into each pepper ring.  You can leave the yolks intact or pop them depending on how you want them.  You could even scramble them ahead of time if that’s what you prefer.  Season with salt and pepper.

Cook until egg is set on the bottom, then flip over and let egg finish cooking.

Serve warm.


Monday, August 13, 2012

I Deserve It!

The other day was a tough one at work, I was fried by lunchtime.  What I really needed to do was get out of the office and relax, spend some quiet time just breathing deeply and having a great lunch.  So, for a minute or two I sat there and thought about where I was going to go and what sounded good to eat…when lo and behold, who should stick their head into my cubicle but my former ‘beforeP10’ self…someone I hadn’t talked to in a while.

Old self:  “So, having a bad day?  You know what would be awesome!  How about a grilled pastrami and cheddar sandwich and onion rings with ranch and maybe a chocolate shake…that would be sooooo good and you deserve it!”

P10 self:  “That does sound really good!  But I don’t eat like that anymore.  Eating like that makes me feel like crap – sick, bloated, nauseous, and self-loathing.  No thanks!”

Old self:  “Oh but we could just go where no one would even know, and just for once, indulge and really let yourself enjoy it!  You deserve it!”

P10 self:  “Wait…what?  I deserve to be upset, nauseous and gassy?  Whose side are you on anyway?”

Old self:  “No, I just mean..the food, the pastrami, the cheese, the fried onion rings…it’s just so…goooood…and you’ve been working hard and stressing a bit so you really really deserve it!”

P10 self:  “You know, I USED to think that way…but now I realize that I DESERVE BETTER!!  Look at me!  Healthier, happier, more relaxed and looking and feeling great – THAT’S what I deserve!  That’s what feels good – and that’s what’s awesome!  I think you’d better leave now ‘cause I'ma slap you upside the head in a minute!”

Old self:  “Well, excuuuuuuuuuuuuuse me!  So sorry!  That used to be your cure-all for a crappy day and I thought you’d like to indulge yourself a little…I know when I’m not wanted!”

She left and I was glad to see her go…she didn’t get it.  Yes, I deserve to relax and unwind and get my second wind and feel better going back to work, but a greasy sandwich, onion rings and chocolate shake are not the answer.  I went out and had a lovely meal of butter sautéed fish and some creamed spinach and sent the bread basket back. 

That’s what I deserved.  I deserved to feel good, and look great and take good care of myself.  And so do you.  So if your former ‘before P10’ self rears its ugly head and tries to talk to into something that’s not part of your new P10 lifestyle, tell it to take a hike (well, you know they won’t, they’ll probably eat ice cream in front of the TV) – so you take that hike, and feel great about yourself and hang in there.

Take care of yourself! 

Why? 

Say it with me:

 YOU DESERVE IT!


Friday, August 10, 2012

Friday Flashback-Cream of Broccoli Soup

There are a lot of new arrivals to the blog and I'm not sure how far back they are looking so I'd like to spend some Fridays highlighting former posts that I think people would really love to try.  And yes, to give myself a break over the summer. 

So let's continue our Friday Flashback with an easy and delicious soup:  Cream of Broccoli Soup.  Singing along with Dana Carvey is required.

Run by the Farmer's Market this weekend and get you some veggies!

Thursday, August 9, 2012

Strawberry Tomato Salad


Isn't this pretty?  And it tastes good too.  A nice light side dish on a hot summer day.

If you don't have a pastry ring, think of what you might have on hand that would work.  I used my biscuit cutter, which looks like a round cookie cutter.  A heart shaped cookie cutter would be cute too.  You could even use a clean tin can with both sides cut open if you're desperate.


Strawberry Tomato Salad
makes four servings

1 cup cherry tomatoes, diced into very small cubes (about 1/4″ per side)
1 cup small strawberries, trimmed and diced into very small strips (about 1/4″ per side)
1 teaspoon extra-virgin olive oil
2 teaspoon aged balsamic vinegar
1/4 teaspoon sea salt
1 ounce goat cheese, crumbled

In small mixing bowl, toss together tomatoes, strawberries, oil, vinegar, and salt. Let marinate at room temperature 10 minutes.

To serve, place the mixture into a 3″ diameter pastry ring on individual plates, pressed to pack lightly. Remove the rings delicately, top each salad with goat cheese, and serve.


Wednesday, August 8, 2012

Cabbage Hashbrowns

Crispy goodness....
Mamma mia!  I had been putzing around for a while trying to decide if I really wanted to try this recipe and I could just kick myself for waiting so darn long.  This was terrific and Bubba and The Kid raved over them. 

Bubba's so funny, he knows the drill, he asked 'is this cauliflower?' and The Kid replied 'oh heck no - these are real potato hashbrowns, thanks Mom for some real food!' 
FYI - once you add onions to something it makes it taste 'real' because I think people associate onions with that real down home taste.  Red onions crisped up taste like bacon so there's another tip to make these even more delicious.

I doubled the recipe to make enough for two patties each and I served them with some pan seared chicken sausage (nitrate free) and it was a great dinner.  But they would also be wonderful for breakfast with some...you guessed it...runny eggs. 


Cabbage Hashbrowns
makes 3 large or 4 small patties
adapted from Maria's Delicious and Nutritious Journal

1 cup shredded cabbage
1/2 onion, chopped
1 egg
salt and pepper to taste
1/4 cup Parmesan cheese
2 tablespoons coconut oil (or butter) for frying


Shred the cabbage (or use pre-bagged if you'd like).

Mix the cabbage, onion, egg, salt, pepper and cheese.

Heat oil in a skillet over medium-low heat. Add mixture to the pan in three portions and then pat them out flat.  Cover and fry for 4-5 minutes. When firm enough, carefully flip the patty. Lower heat, cover and cook for another 4-5 minutes, or until golden brown.

COMPARISON (courtesy of Maria):
1 cup Potato Hashbrown 116 calories, 28 carbs, 2 sugar, 4 fiber
1 cup Cabbage Hashbrown 29 calories, 3 carbs, 0 sugar, 2g fiber

Tuesday, August 7, 2012

Thai 'Rice' with Pineapple and Shrimp

This is yet another one of our family's favorite recipes that has had to go 'bye bye' since we started eating on P10.  It's also based on an old WW recipe and we love this extra kick and refreshing pineapple bite to this one. 


Again, for you Susies out there, feel free to kick up the spices and for those who don't appreciate the spicy, feel free to tone it down a bit.  When I make this I skip the chiles and cilantro and use chili powder instead. 

This could be a quick and easy main dish or a great side dish to a lovely piece of fish.


Thai Rice with Pineapple and Shrimp
makes 4 servings


2 cups Cauliflower Rice
2 tablespoons butter
8 oz canned unsweetened pineapple chunks, drained or fresh, chopped
1 tablespoon tamari or soy sauce
1/2 average serrano chile, seeded and finely chopped

4 oz cooked small shrimp, thawed and chopped

2 tablespoons cilantro

Melt the butter in a large pan, mix in the rice and continue heating until rice is warmed through.   Stir in the rest of the ingredients and cook for another few minutes.